
This post may contain affiliate links. Please read our disclosure policy.
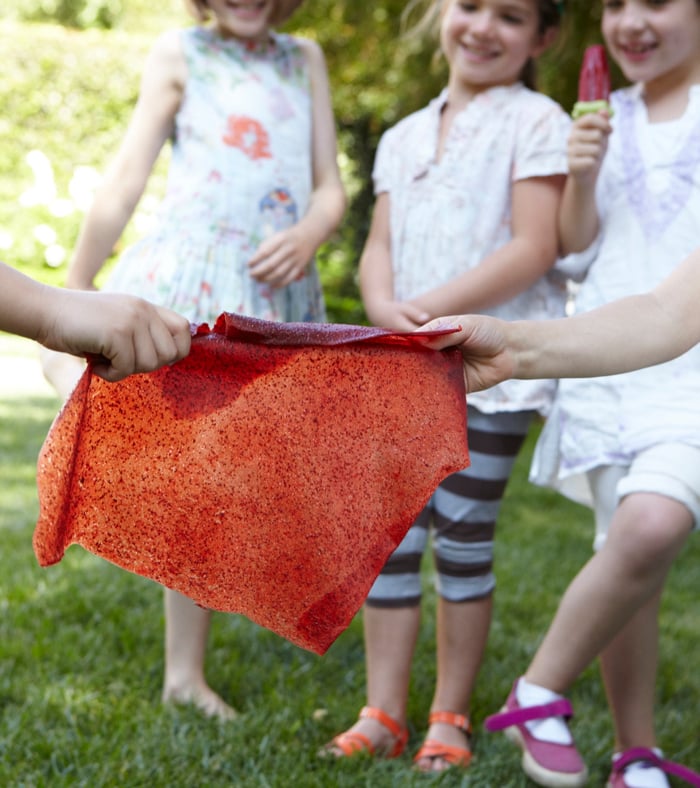
Making Strawberry Fruit Leather in the Dehydrator couldn’t be any easier, and it’s the perfect use for summer strawberries!
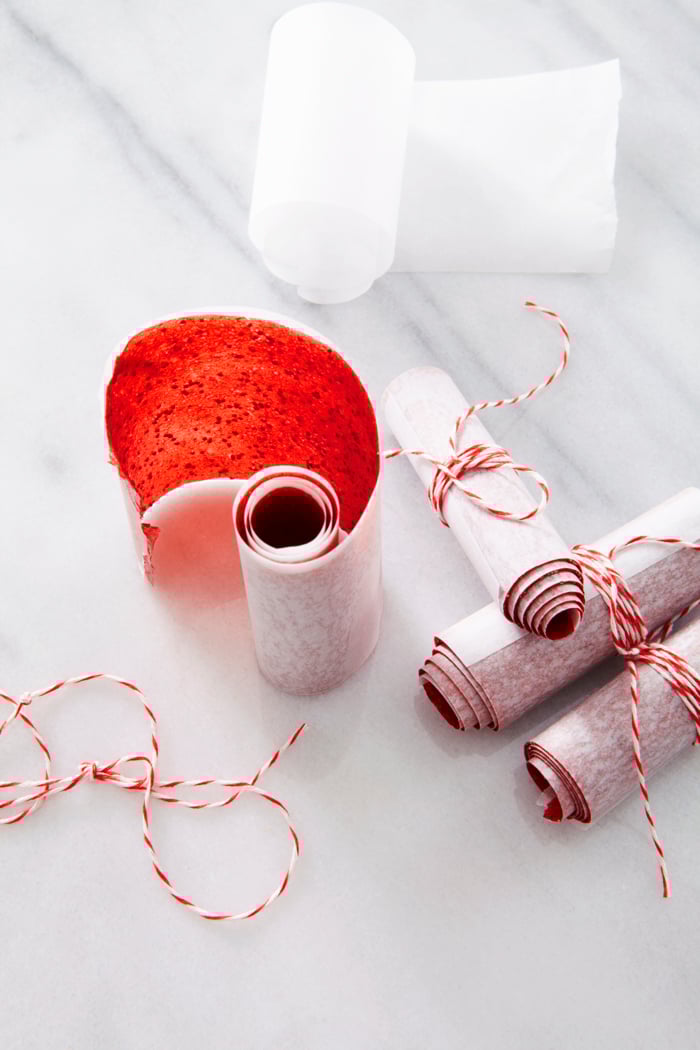
Table of Contents
Why I Love This Recipe
- Simple and Versatile: You can turn almost any fruit into delicious fruit leather. While we love experimenting with different flavors, Strawberry Fruit Leather is a classic favorite in our kitchen.
- Naturally Sweet: Made with fresh summer strawberries and a touch of honey or agave, this recipe creates a naturally sweet snack that’s far healthier than store-bought fruit roll ups that are loaded with sugar.
- Great for Using Seasonal Fruit: This recipe is a perfect way to use up extra seasonal fruit and reduce food waste while making something your kids will love.
- Kid-Approved: My kids love the fun, strip-form presentation of homemade fruit leather, and I feel good knowing it’s made from simple, wholesome ingredients.
- Endless Flavor Options: If strawberries aren’t available, you can easily switch it up with other fruits and make Peach Fruit Leather, Persimmon Fruit Leather, or Pineapple Fruit Leather. The possibilities are endless, and each variation makes for a delicious, on-the-go snack!
The Ingredients
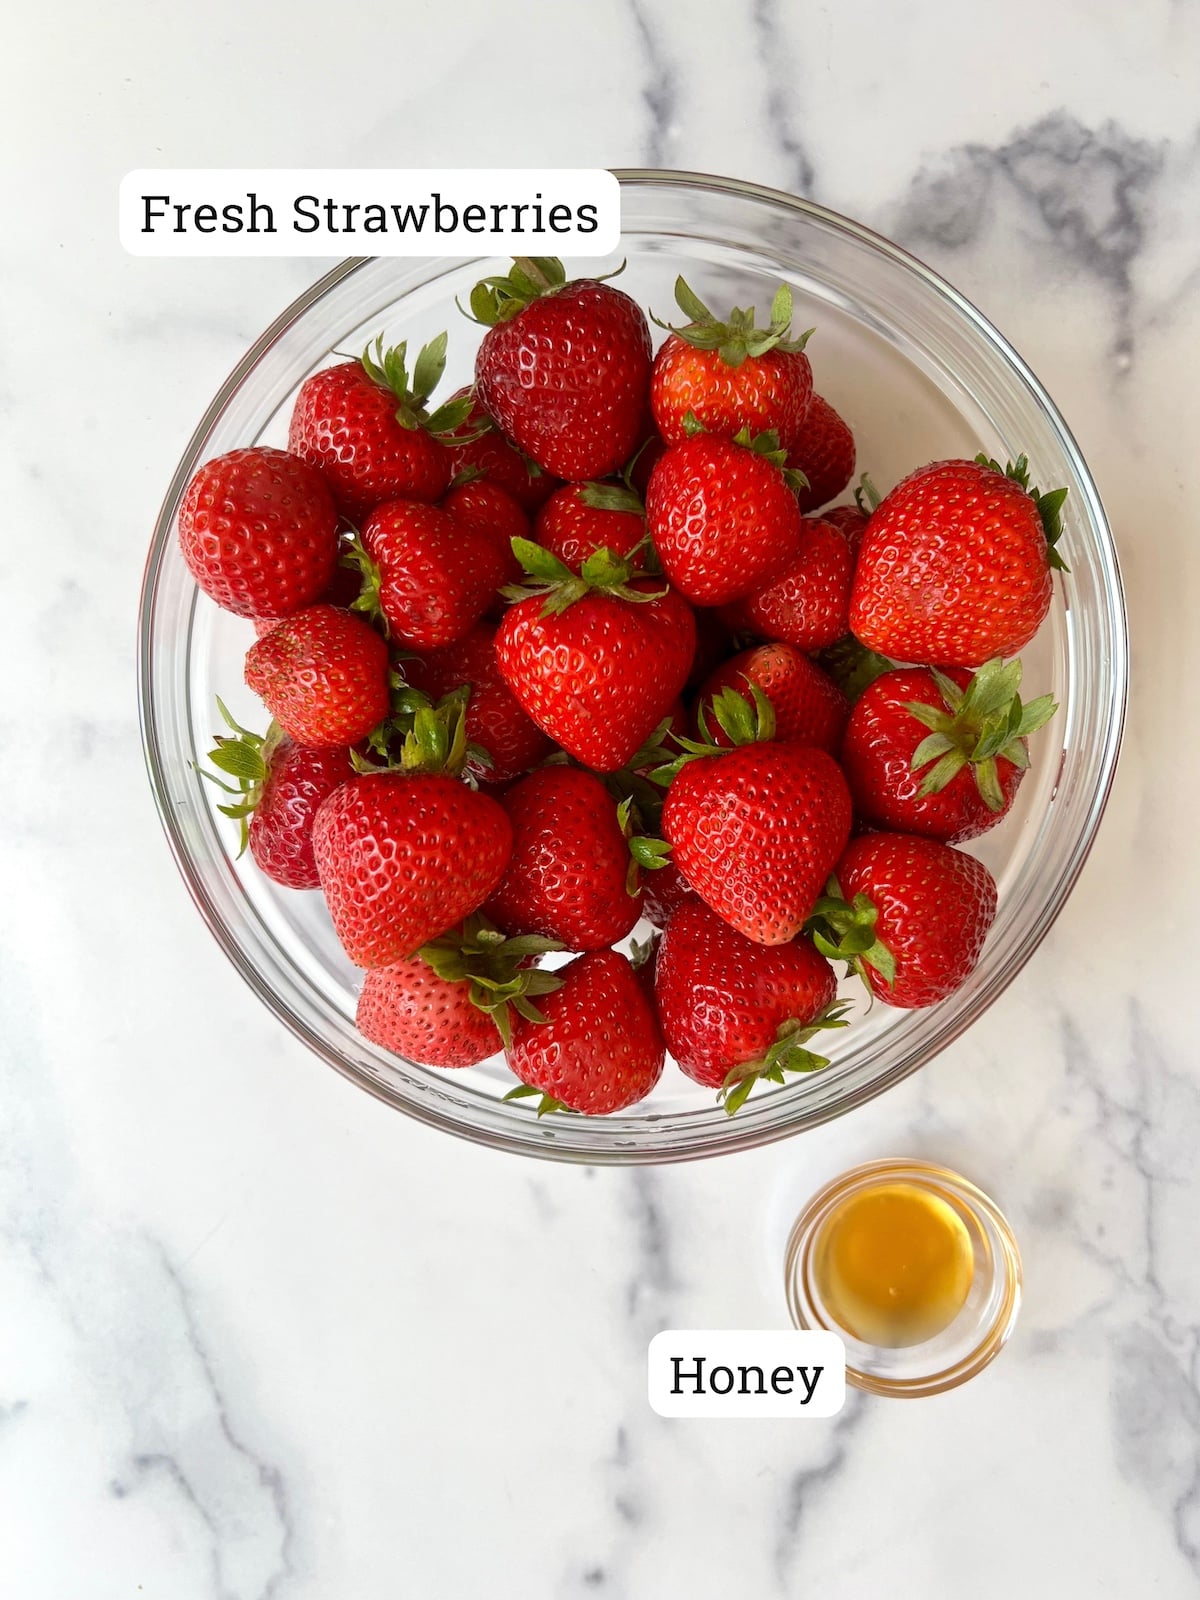
- Fresh Strawberries: The more ripe the berries, the more naturally sweet they’ll be. I often use strawberries that are about to go bad so that we minimize food waste!
- Honey: Having additional sweetener is optional. If you feel your strawberries are sweet enough, leave it out. You could also use agave instead of honey if that’s what you prefer!
How to Make Strawberry Fruit Leather in Dehydrator
This strawberry fruit leather recipe is made in a countertop dehydrator. If you’re going to be making fruit leather often, a dehydrator is worth the investment. It prevents the need to turn on your oven, and you can set it and forget it for several hours. If you don’t have a dehydrator, here’s a recipe post on how to make strawberry fruit leather in the oven!
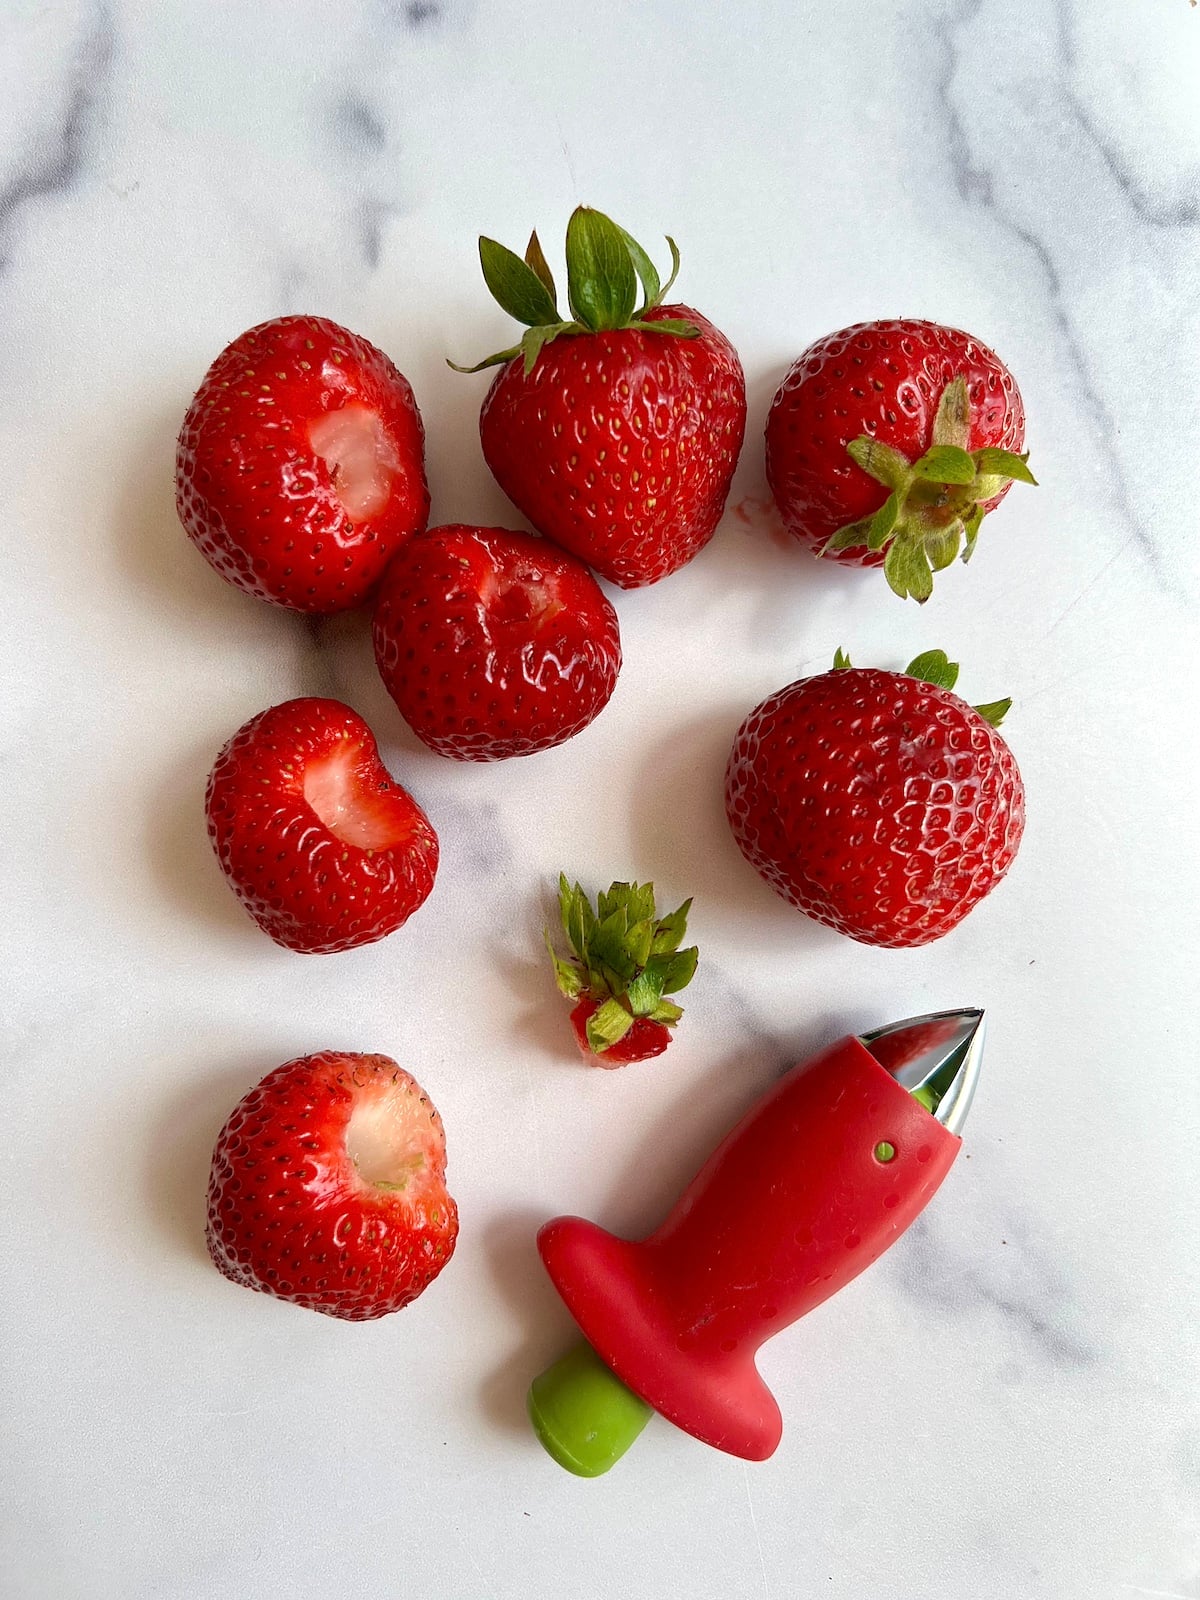
Step 1: Prep the strawberries by washing and remove the stems. I used this strawberry huller!
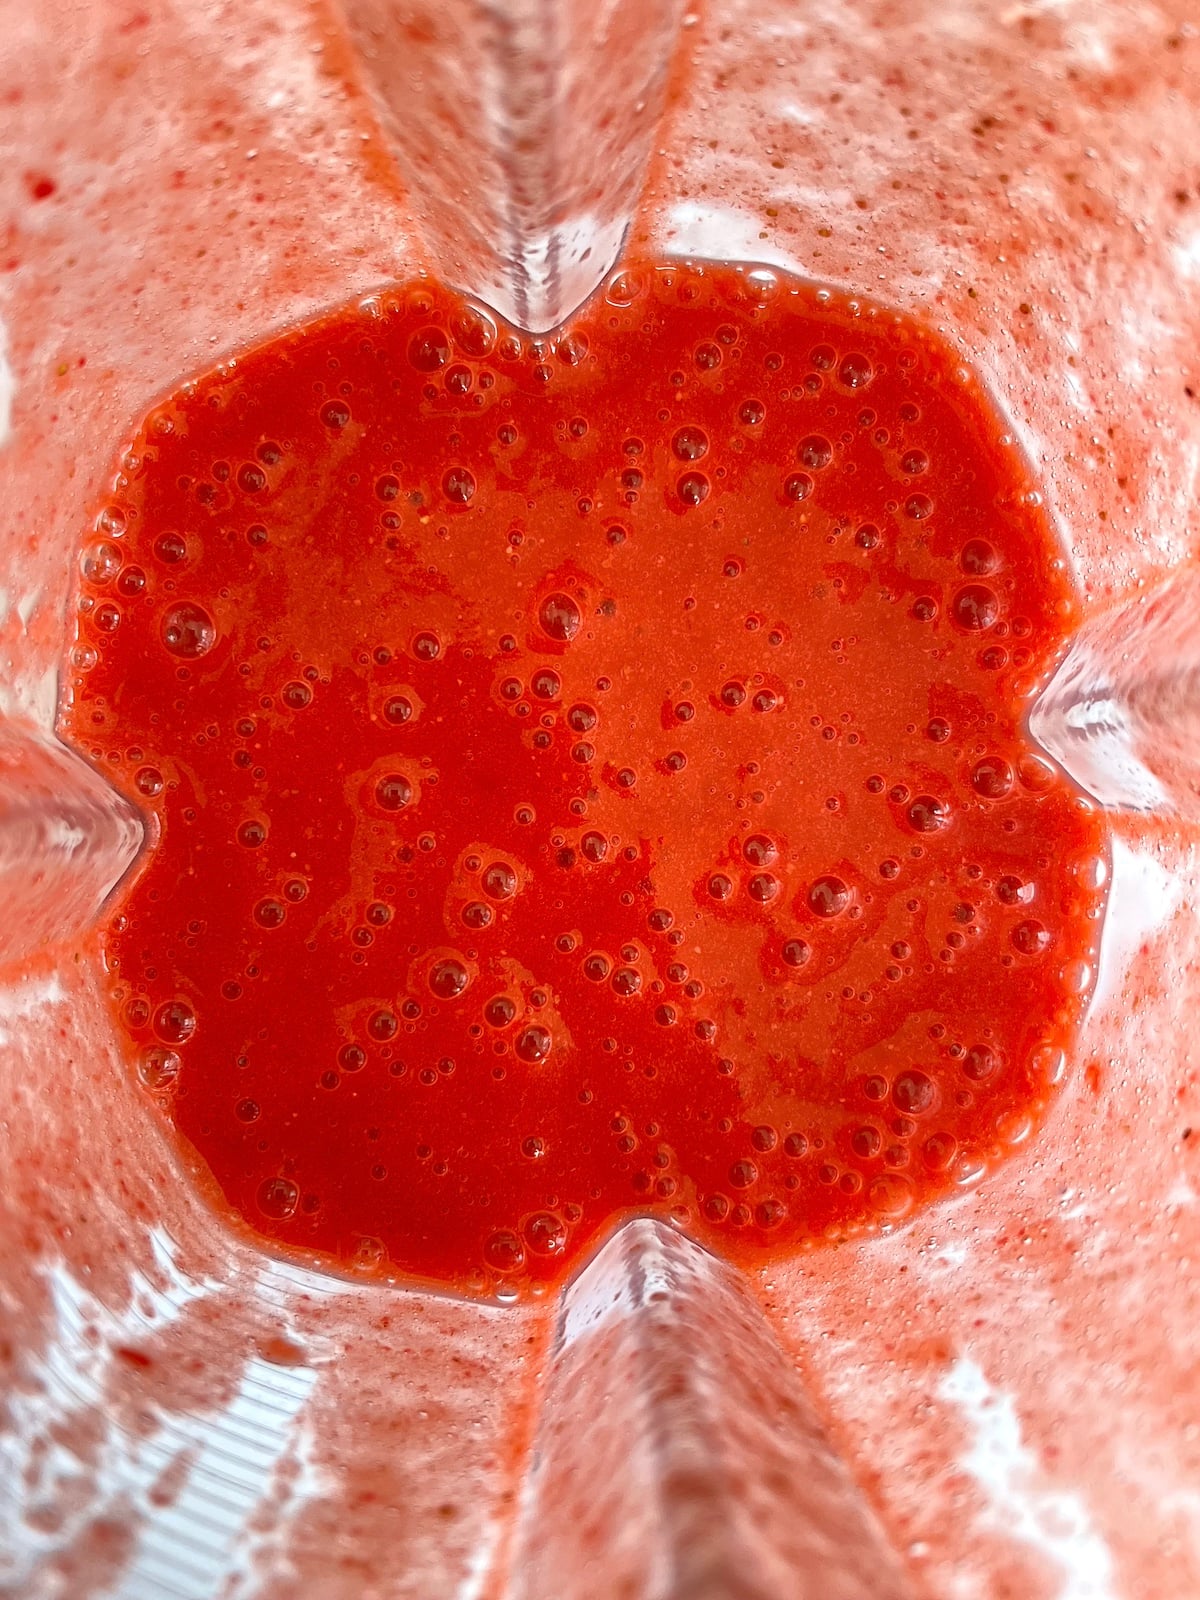
Step 2: Place the strawberries in a blender or food processor. Drizzle a bit of honey or agave if you want to sweeten them up a bit. This is optional, and if your berries are very sweet, you can skip the additional sweetener. Blend until smooth.
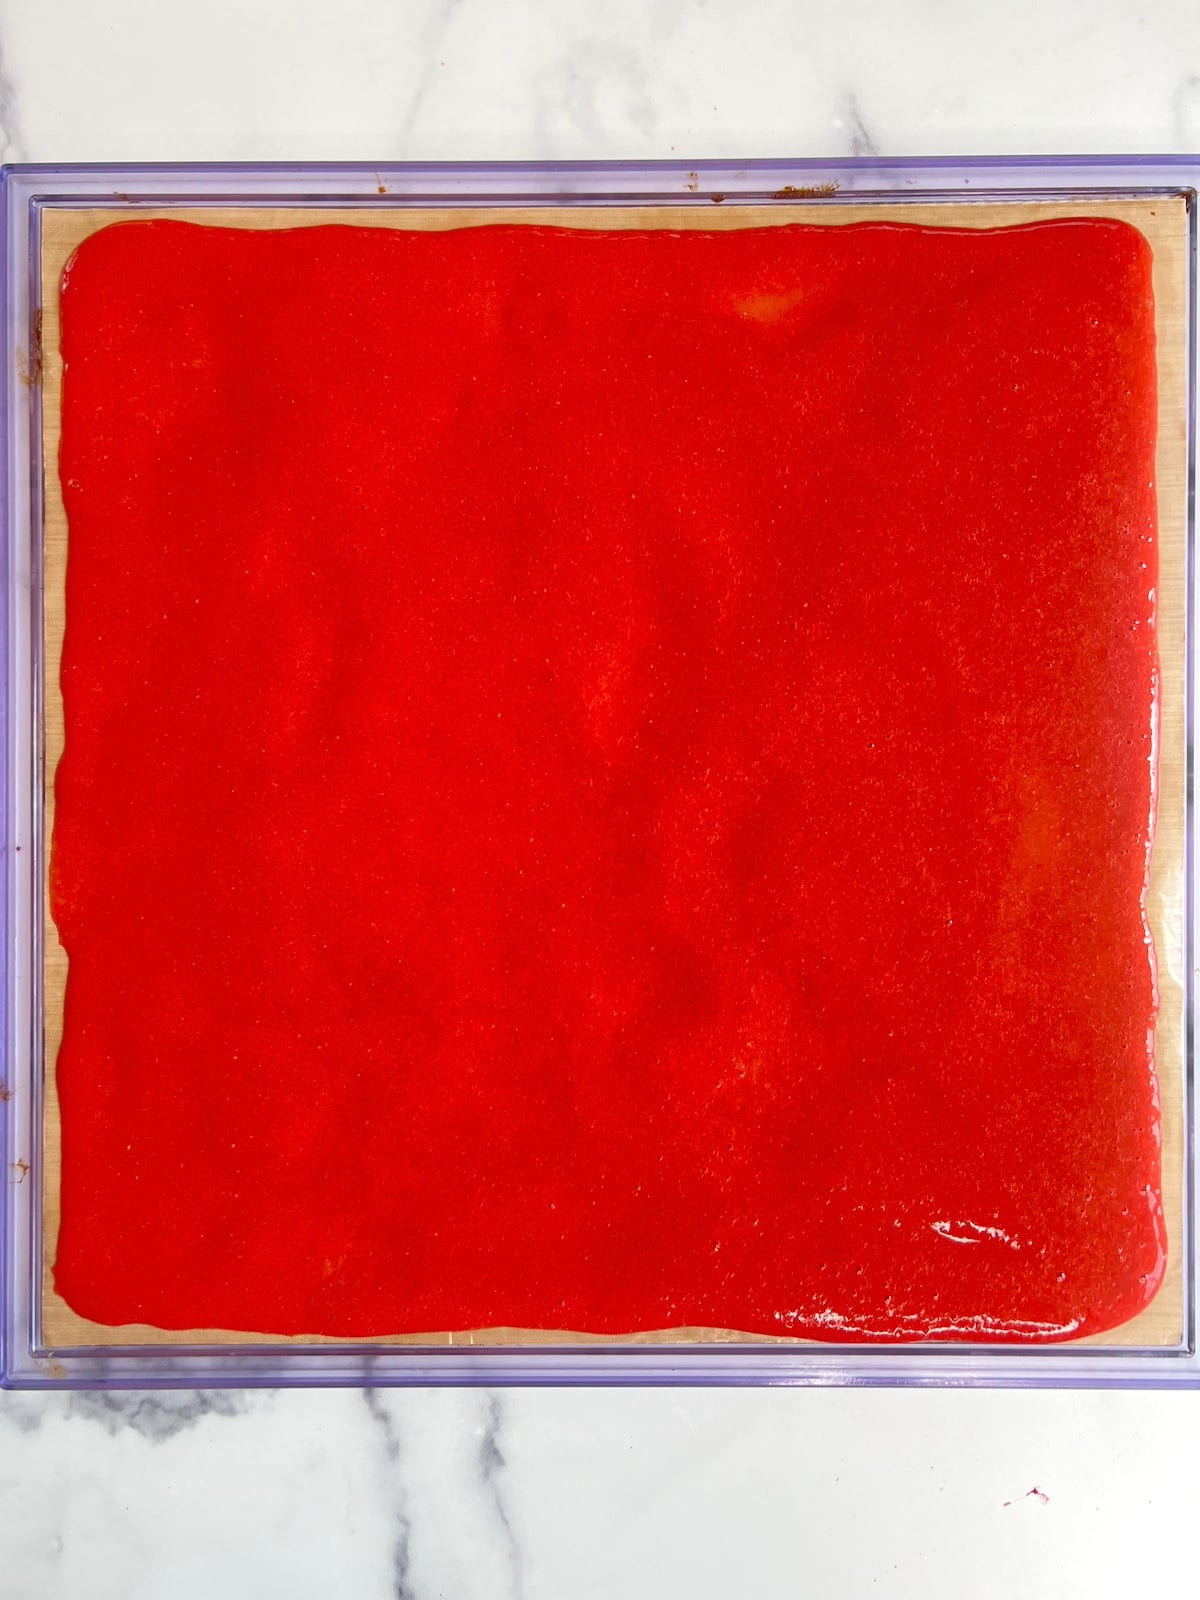
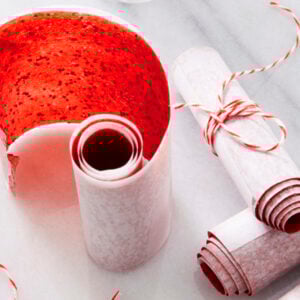
Step 3: Pour the strawberry puree onto a dehydrator sheet. Use a spoon or offset spatula to spread the mixture in a completely even layer. You don’t want the mixture to be too thin or too thick – this is where the experimenting comes in to play!
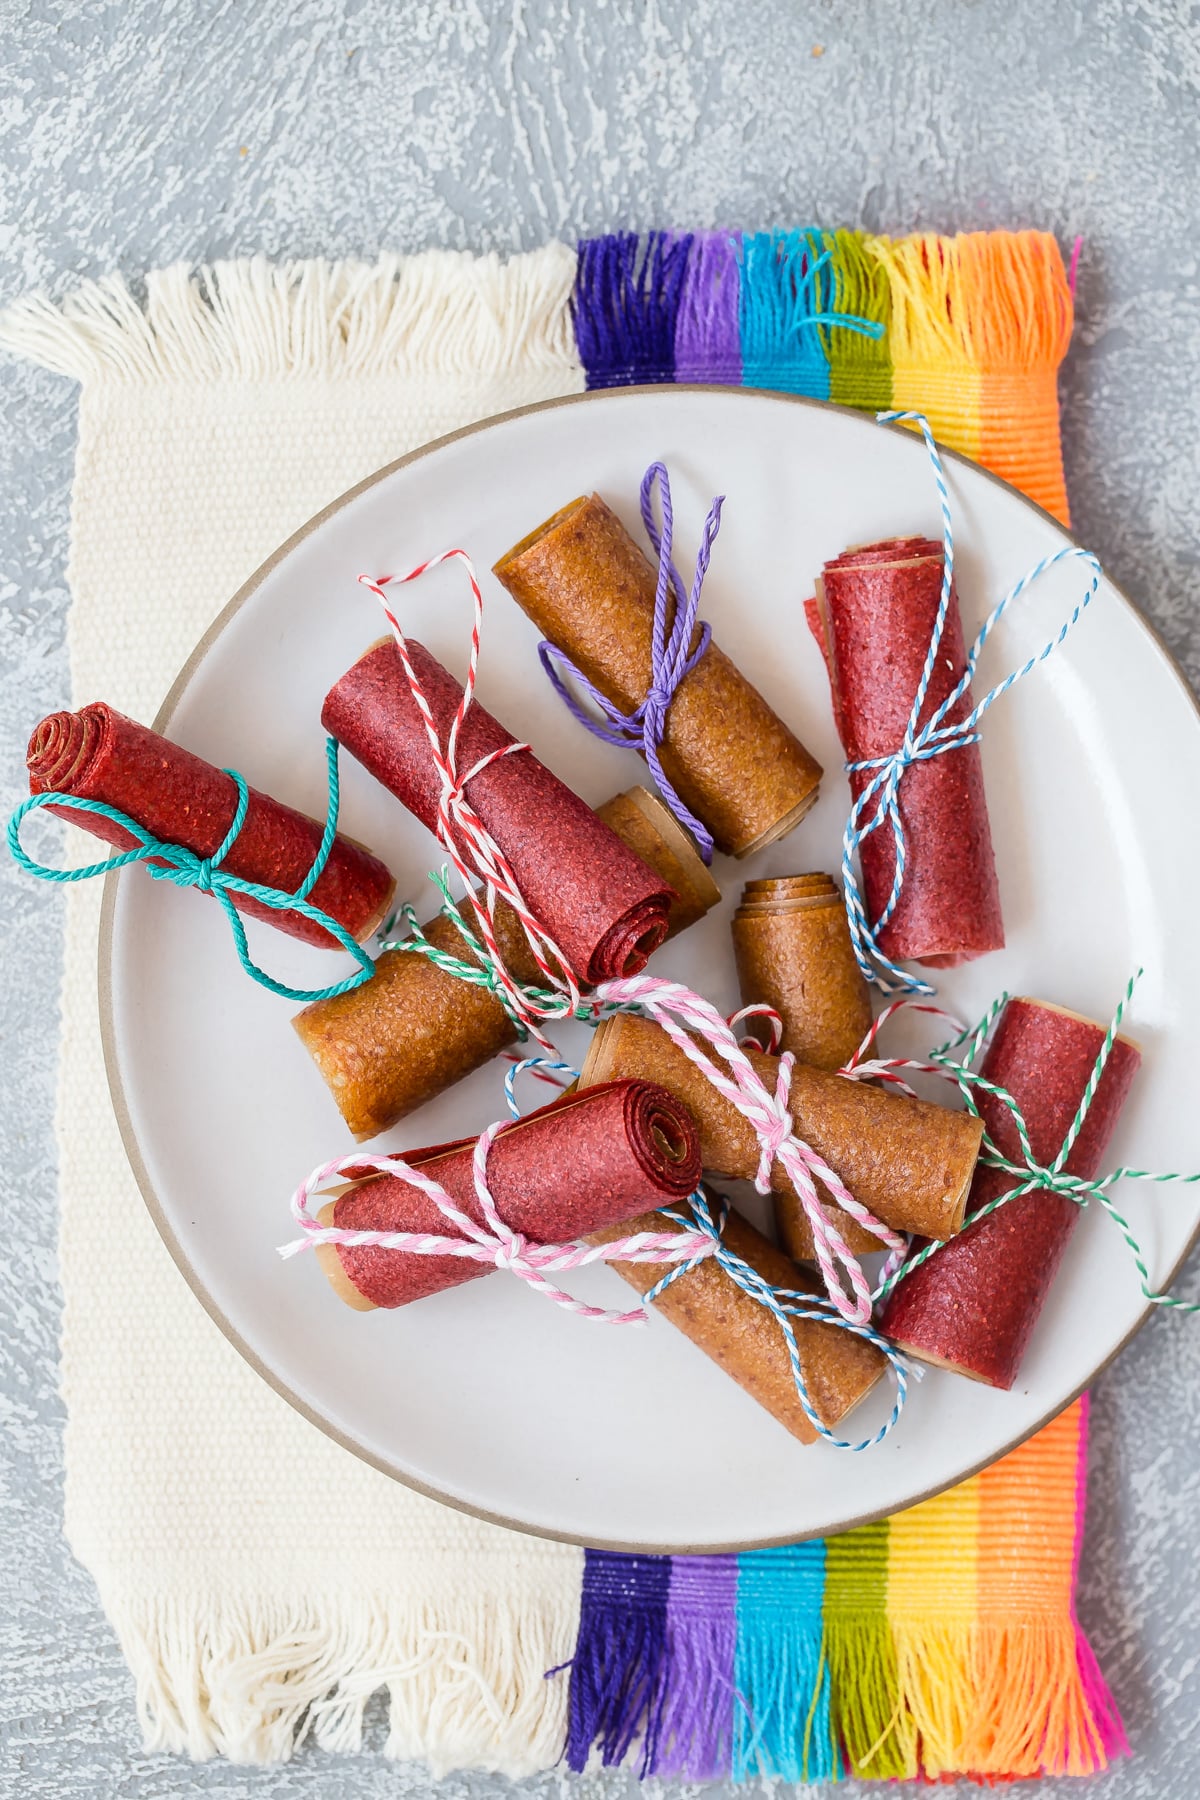
Step 4: Place the sheets in the dehydrator, set to 135°F for 3-4 hours, until the fruit leather is dry to the touch, and no longer sticky. Cut the fruit leather into strips and roll them up in parchment paper.
Tips for Making Homemade Strawberry Fruit Leather
- Storage: Fruit leather can be stored in an airtight container at room temperature for a few months, although ours are usually gone much faster than that!
- Use Ripe Strawberries: For the best flavor and natural sweetness, choose ripe strawberries. The riper the berries, the more vibrant and delicious your fruit leather will be.
- Spread Evenly: When spreading the strawberry puree onto the dehydrator trays, aim for an even thickness. This ensures consistent drying and prevents some areas from becoming too brittle while others stay too moist.
- Check for Doneness: Your fruit leather is ready when it’s no longer sticky to the touch and peels easily from the tray.
FAQs
Cracking can happen if the fruit leather is too dry. Next time, check for doneness earlier or spread the puree slightly thicker on the tray. Homemade fruit leather can be a bit of trial and error!
Absolutely! You can blend strawberries with other fruits like raspberries, blueberries, pineapple or peaches to create unique flavor combinations.
The drying time can vary depending on the thickness of the puree, the dehydrator you use and the settings you have it on. Typically, it takes anywhere from 3 to 5, sometime up to 8 hours at 135°F to achieve the perfect texture.
More Recipes Using Strawberries


Whip up this easy, healthy Strawberry Fruit Leather in your dehydrator for a snack that both kids and adults will love. Feel free to experiment with different fruits, and enjoy a treat that’s as fun to make as it is to eat! If you have any questions, leave a comment below!
Want more Weelicious? Subscribe to my newsletter and follow me on Instagram, Facebook, and TikTok for all the newest recipes!
Strawberry Fruit Leather – Dehydrator Method
Equipment
Ingredients
- 3 cups strawberries
- 1 tablespoon honey or agave, optional
Instructions
- Wash the strawberries and remove the stems.
- Place strawberries in a blender. Drizzle with honey or agave if you want to sweeten them up a bit. This is optional, and if your berries are very sweet, you can skip additional sweetener. Blend strawberries until smooth.
- Pour the strawberry puree onto a dehydrator sheet. Use a spoon or offset spatula to spread the mixture in a completely even layer. You don't want the mixture to be too thin or too thick – this is where the experimenting comes in to play!
- Place the sheets in the dehydrator set to 135°F for 3-4 hours, until the fruit leather is dry to the touch, and no longer sticky.
- Cut the fruit leather into strips and roll up in parchment paper. Fruit leather can be stored in at airtight container at room temperature for a few months, although ours never last that long!
Video
Notes
- Storage: Fruit leather can be stored in an airtight container at room temperature for a few months, although ours are usually gone much faster than that!
- Use Ripe Strawberries: For the best flavor and natural sweetness, choose ripe strawberries. The riper the berries, the more vibrant and delicious your fruit leather will be.
- Spread Evenly: When spreading the strawberry puree onto the dehydrator trays, aim for an even thickness. This ensures consistent drying and prevents some areas from becoming too brittle while others stay too moist.
- Check for Doneness: Your fruit leather is ready when it’s no longer sticky to the touch and peels easily from the tray.


i just tried making the leather fruit with 2 big boxes of strawberries and the fruit is now crispy and stuck to the paper. So bummed. I am pretty sure it was parchment paper…
oh, i cooked it for 3-4 hours because it was sticky in the middle but dry on the edges. argh!
Have these in the oven now… been in just under 2 hours and they’re getting the “black spots” of burn as people above posted about. I used sprayed parchment. I’ll try again and use the plastic cling wrap I think. My fruit mixture is apples, frozen strawberries, a little honey.
[…] favorite solution though is to make fruit leather. I first got the idea from this post on Weelicious. And actually, the first time I made it, I used fresh strawberries and agave […]
Okay, tried this yesterday. I got it all set up, put it in our old wedgewood oven for about 45 minutes before we decided we wanted to go to the farmer’s market (again) So I turned the oven off, figured I’d turn it back on and do the rest of the drying later. When I came home about 2 hours later, it was dryer than when we left. I decided to just let it sit in my oven overnight and it was totally dry before I went to bed! This morning it is perfect and ready to roll. I’m going to try it next time just sitting in the oven without baking at all. Fair warning, my oven is old and the pilot light keeps the small oven portion warmer than modern ovens do!
I think that I left them in too long. As it is crispy:( I want to try it again, but do not want to waste anymore strawberries.
Attempted this two weeks ago with strawberries from the farmers market and honey…it just burned in my oven. I may have used a larger pan and so the layer was maybe too thin. I just put my second attempt into the oven with more fruit this time. Right after I did this I realized were going to make a 5 hour trip tonight to Michigan…I’ll have to somehow bring the leather on the parchment with us in the car so that it can soften up over night! Hmmm!
look on starwars blog.com on the zilo beast for my story. and this was good(not me !).
We tried this with red cherries that we picked from the orchard and agave syrup instead of honey. Worked out really good. I agree that getting the layer as even as possible is best. Great recipe!
Katherine, you definitely don’t want to use wax paper. The wax will melt! Some recipes suggest plastic saran wrap, but I don’t suggest that either because of the potential for toxicity. Parchment paper works very well!
I Just made a batch with wax paper not realizing that I would not be able to get it separated from the paper…I guessI should have used parchment paper…..it is stuck to the paper….guess I will be going back to the farmers market to get more berries….did anyone else have this problem???
Thank you Kristen! I’m about the make a batch right now and I was wondering about the best way to spread it.
I baked four sheets of leather this weekend with mixed results. The most successful batch resulted when instead of spreading the puree onto the sheet with a spatula, I POURED the puree onto the sheet. I then held the parchment paper in place as I gently tilted the tray back and forth to achieve a thin, even layer. I found that with the spatula spreading method, I could never achieve a perfectly even layer which caused burning and other inconsistencies. The batch that I used the pouring and tilting technique had a consistent thickness and did not burn at all. It looked totally “perfect” like store bought leather and was soft enough to roll! It really is true that you must let the leather sit overnight to soften up before attempting to roll it.
These turned out great, thanks for the recipe! How do u recommend storing them? Do they need to be refrigerated?
What a great post, glad to be an alumni!
When is your cookbook coming out? I’ll be FIRST in line to purchase. Can’t wait 🙂
what about watermelon?? would that be too liquidy?