
This post may contain affiliate links. Please read our disclosure policy.
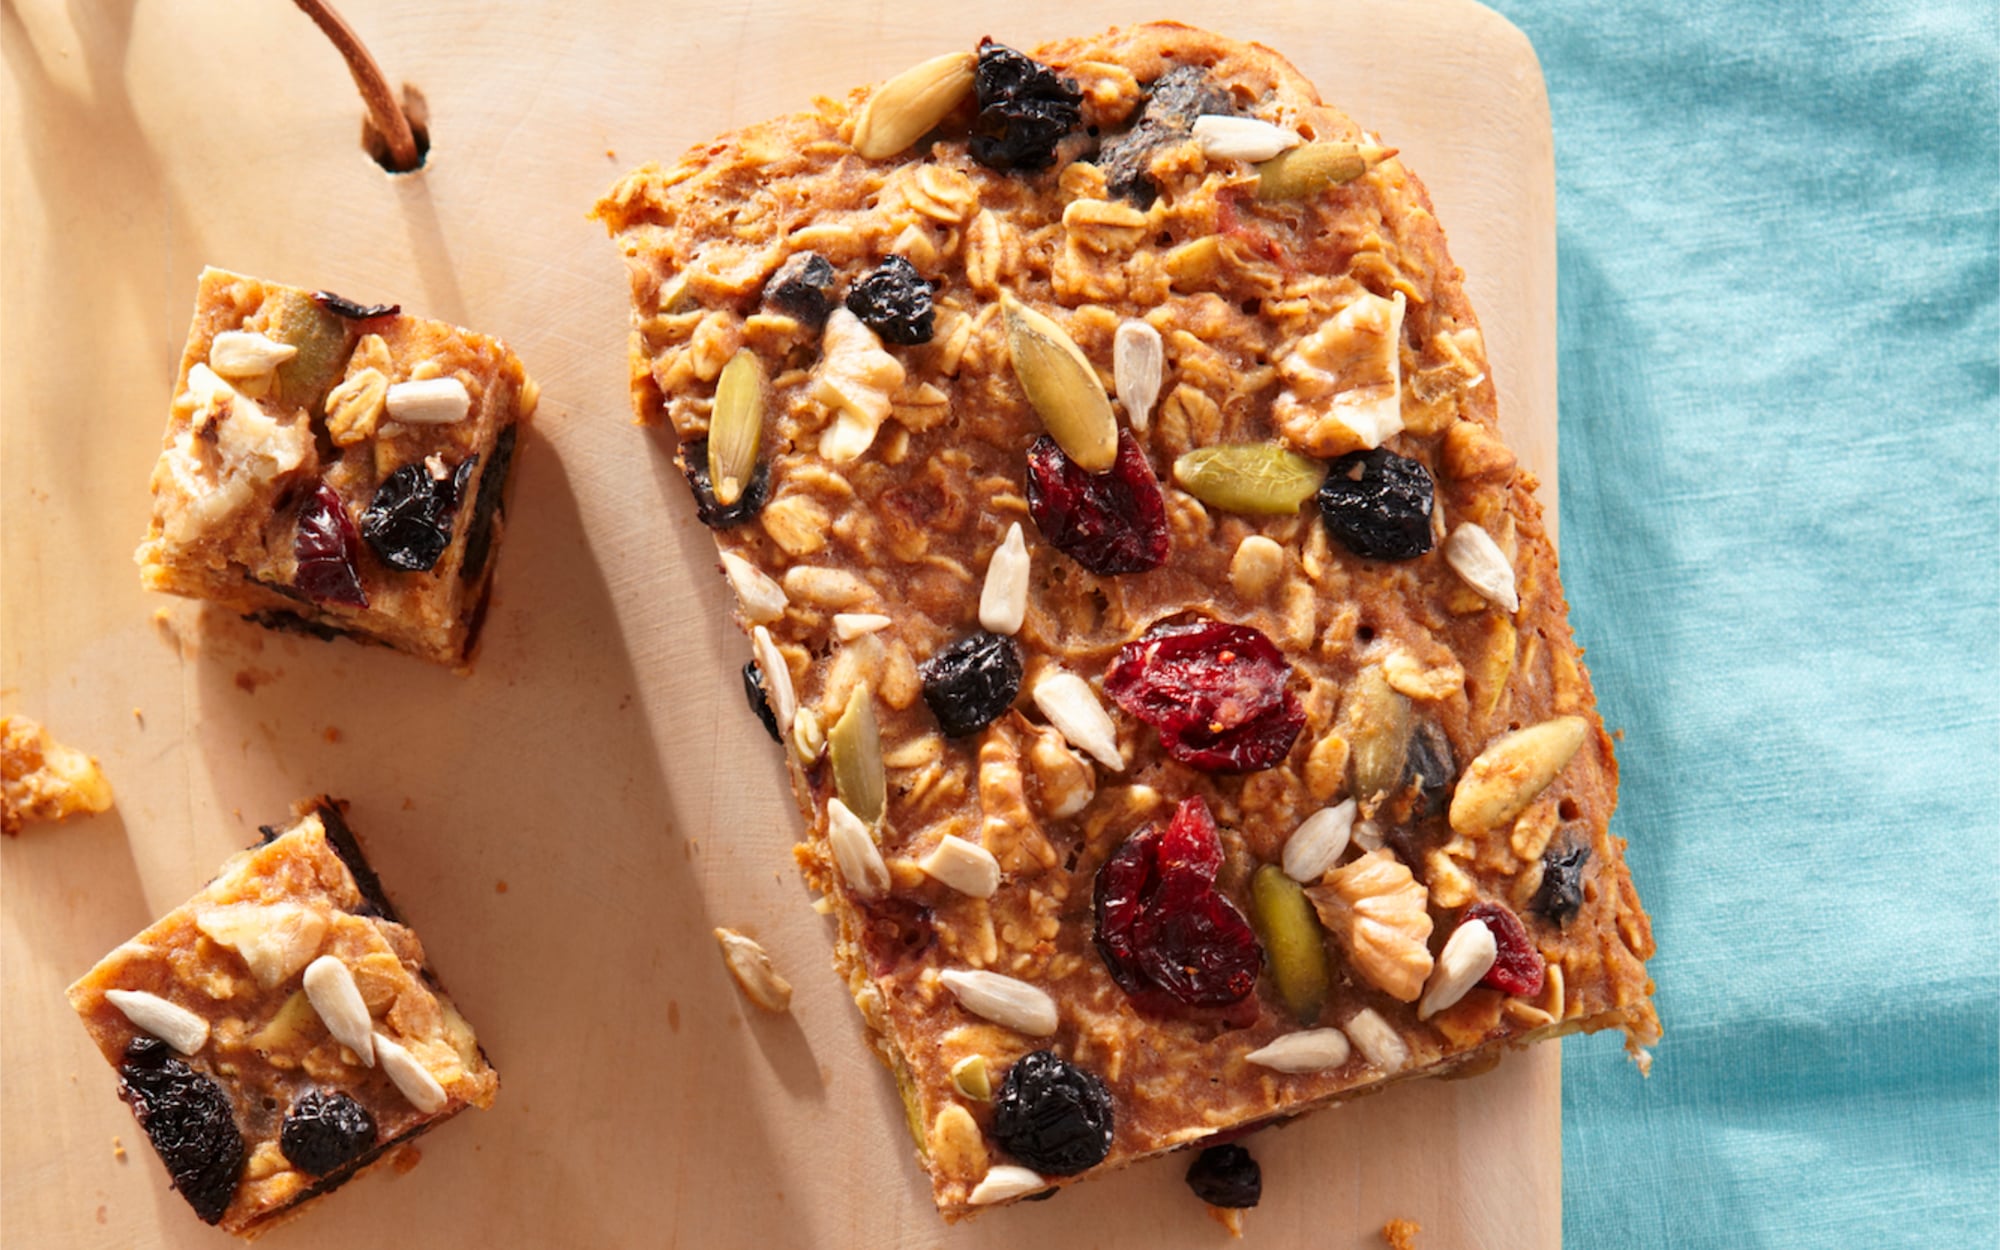
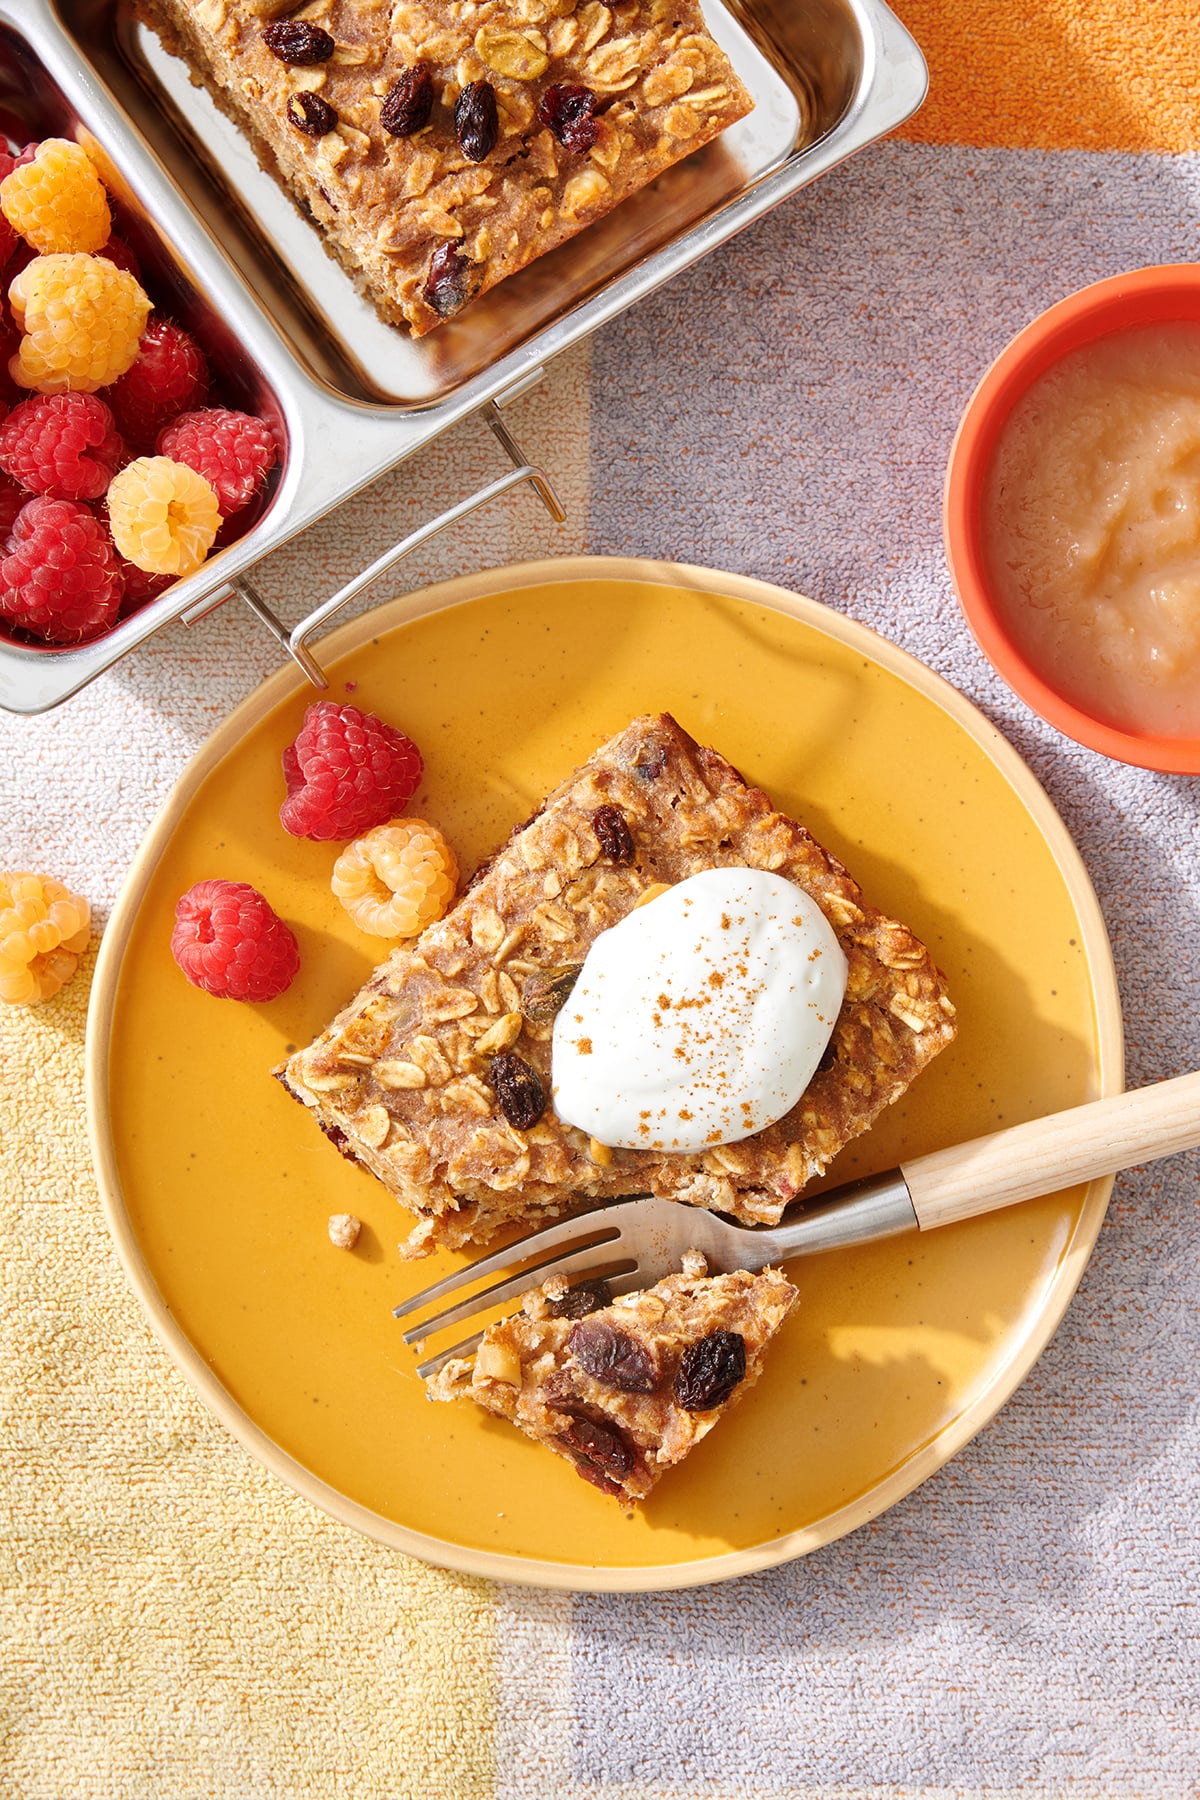
For any parent with young children, mornings can be a real challenge. That’s why I regularly whip up a batch of these convenient Oatmeal-On-The-Go Bars every couple weeks. They serve as a quick, healthy breakfast option, whether enjoyed at the table or on the move. These bars are loaded with oats, dried fruits, nuts, and apple sauce, making them a perfectly balanced and time-saving morning meal!

I’m a self-proclaimed oatmeal fanatic! Oatmeal is my ultimate go-to not only for its nutritious goodness but also for its quick-fix nature, perfect for us parents dashing through hectic mornings. But I’m not the only one crazy about it at home. My kids ask for oatmeal just as much as they ask for their fluffy pancakes, omelets, and golden waffles.
I wanted to create something with oatmeal that’s ideal for those crazy, no-time-to-cook mornings (which, let’s be real, is almost every morning for many of us!). So, I brainstormed and came up with the concept of these Oatmeal On-The-Go Bars. Considering how every mom I know seems to have a trusty LARA, Clif, or Odwalla bar stashed in her bag alongside the chaos essentials like wallets, diapers, wipes, and sippy cups, I assumed coming up with a delicious and healthy oatmeal bar would be a welcomed idea!
Why I Love Oatmeal On-The-Go Bars
- Quick & Nutritious Breakfast: Oatmeal bars provide a fast, healthy breakfast option for busy mornings, perfect for kids (and parents) on the go.
- Convenient Snack for Outings: These portable bars are mess-free snacks ideal for busy parents and active kids during travels and outings.
- Sustained Energy for Activities: Loaded with nourishing ingredients, they offer a long-lasting energy boost for active days and after-school activities.
- Versatile Treat Anytime: Enjoy them as morning bites, lunchbox additions, or after-school snacks, catering to kids’ needs throughout the day.
- Healthy & Filling Snack: Packed with fiber and essential nutrients, these bars keep hunger at bay, making them an ideal option for both parents and kids.
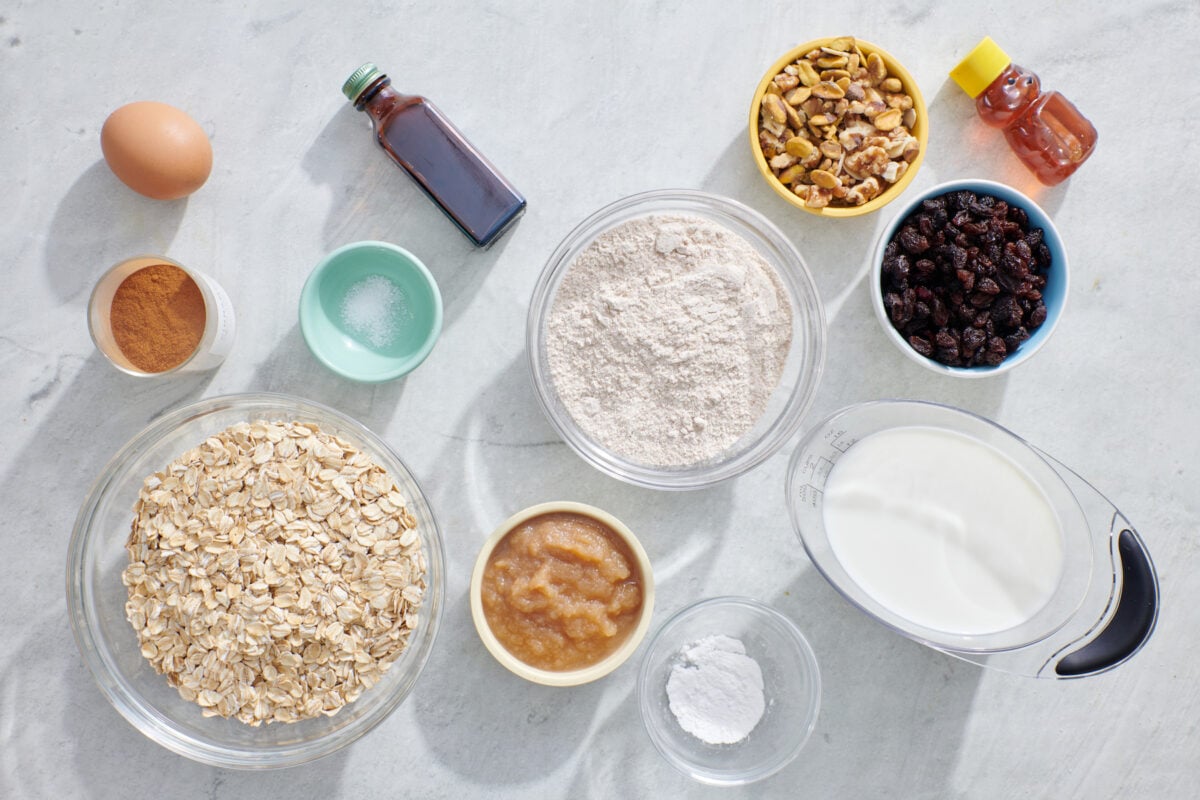
The Ingredients
- Old Fashioned Oats
- Whole Wheat Flour
- Ground Cinnamon
- Kosher salt
- Baking Powder
- Milk of Choice
- Honey, Agave or Maple Syrup
- Applesauce
- Large Egg
- Vanilla
- Dried fruit (cranberries, raisins, blueberries, and/or cherries)
- Nuts or Seeds (walnuts, pistachios, pecans, sunflower seeds, and/or pepitas)
*See recipe card for exact measurements and substitutions*
How to Make Oatmeal On-The-Go Bars
1. Preheat Oven: Preheat your oven to 375°F.
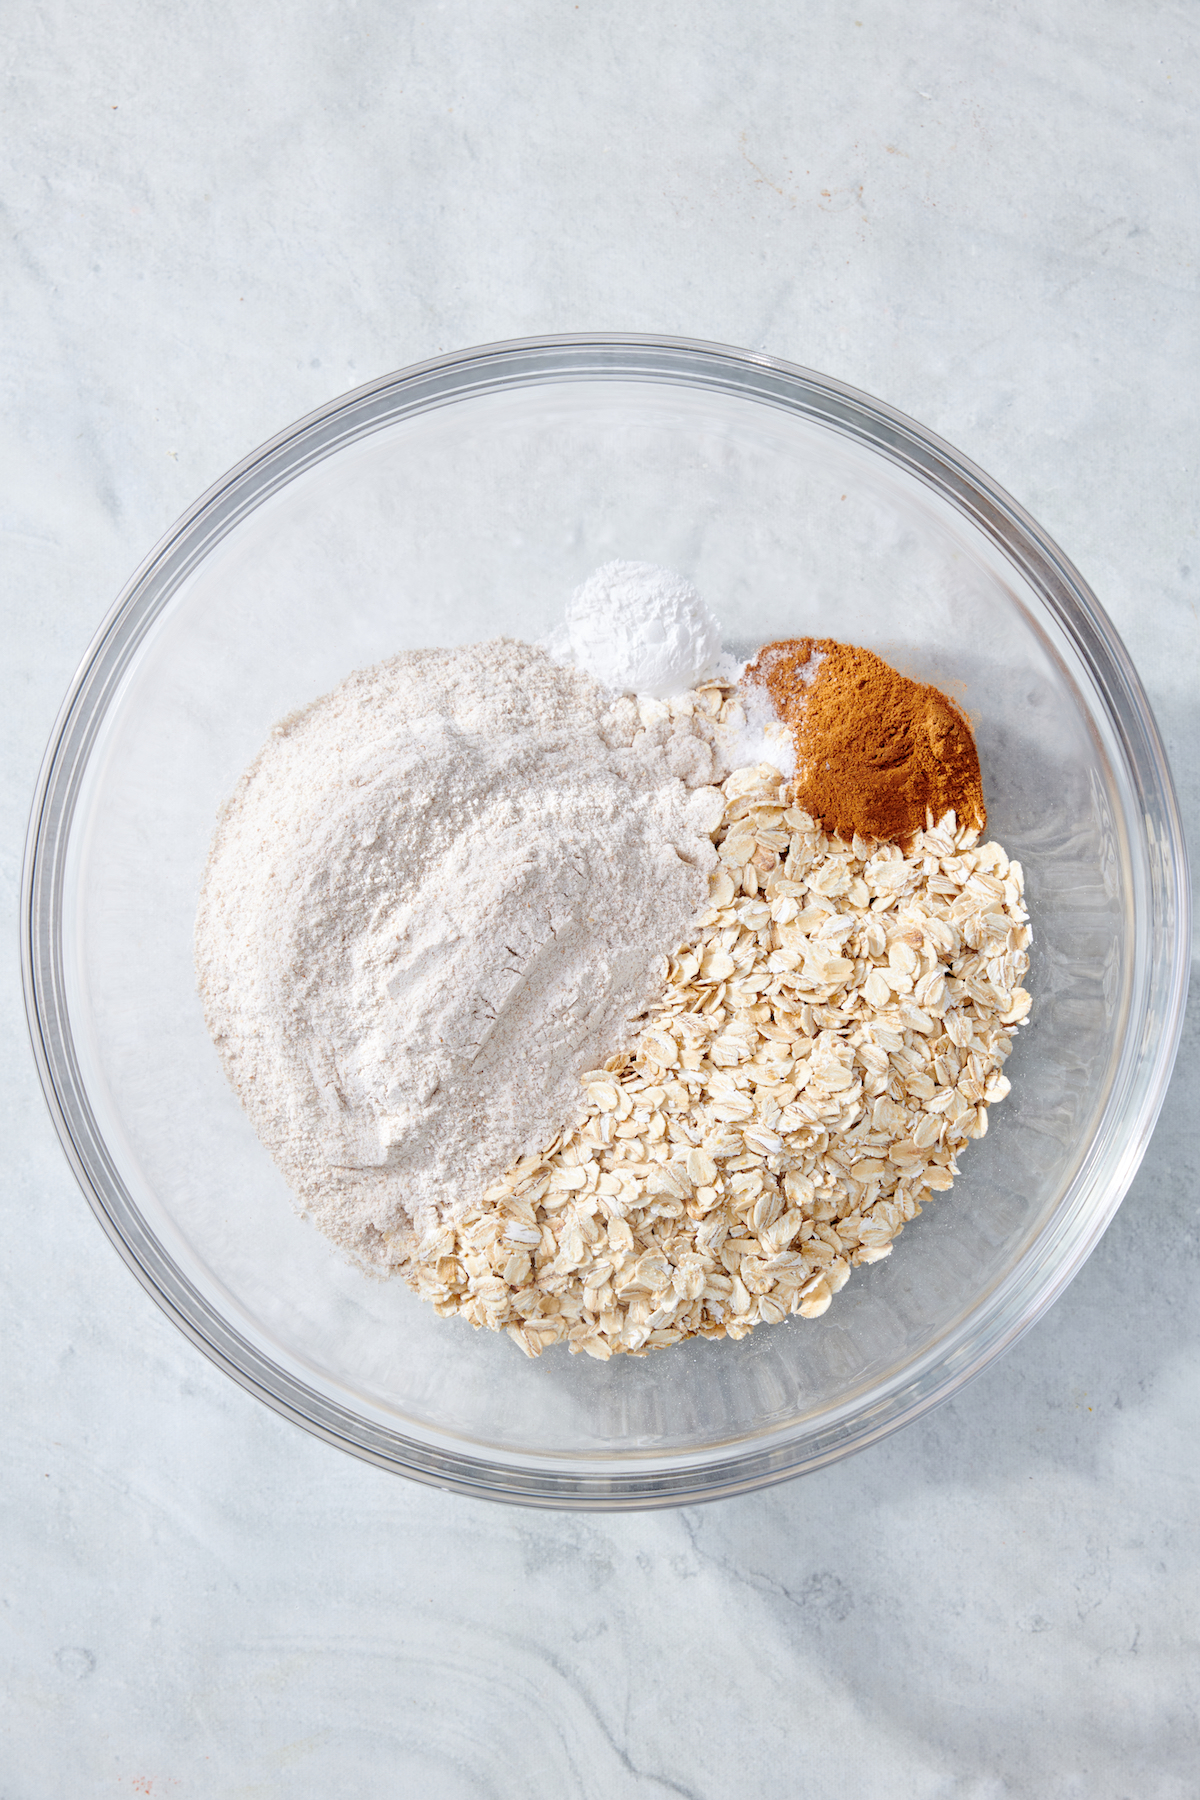
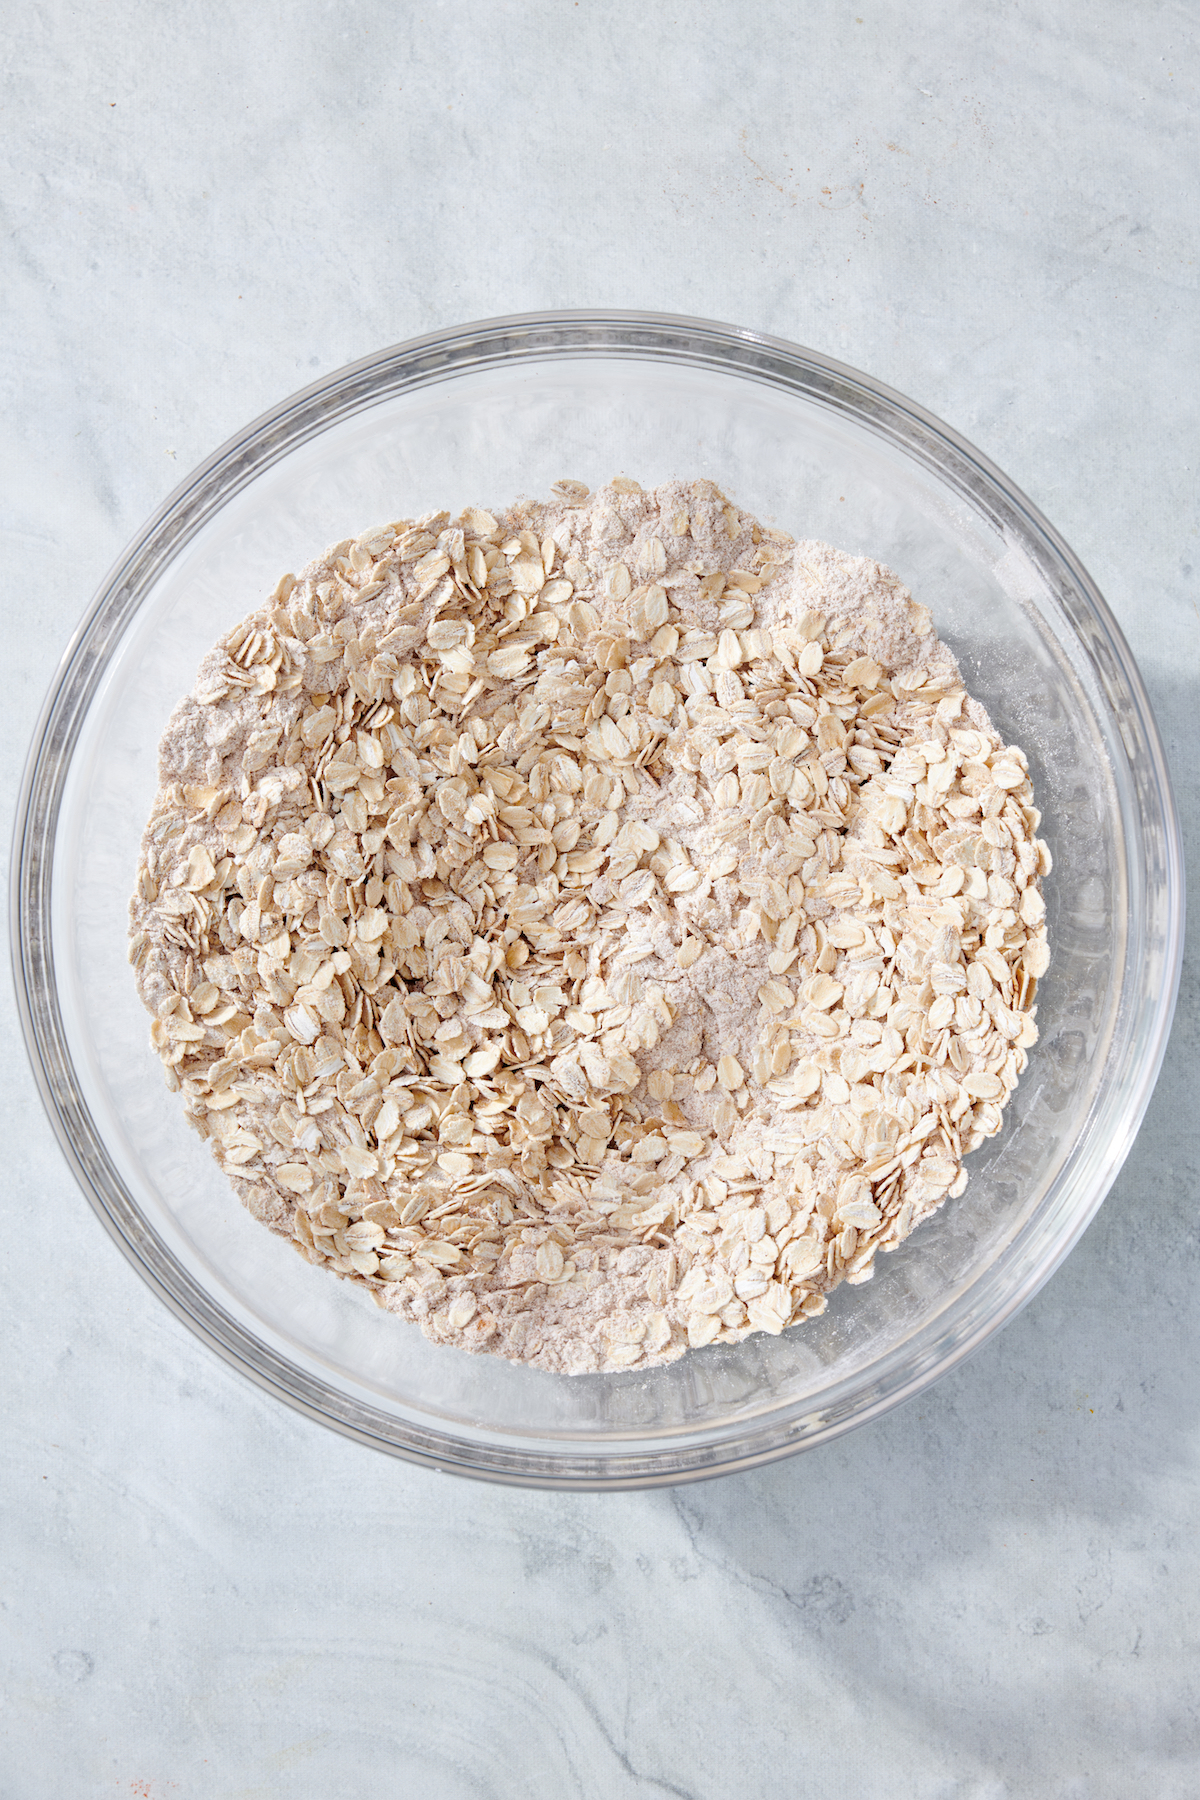
2. Combine Dry Ingredients: In a bowl, mix the oats, flour, cinnamon, salt and baking powder thoroughly.
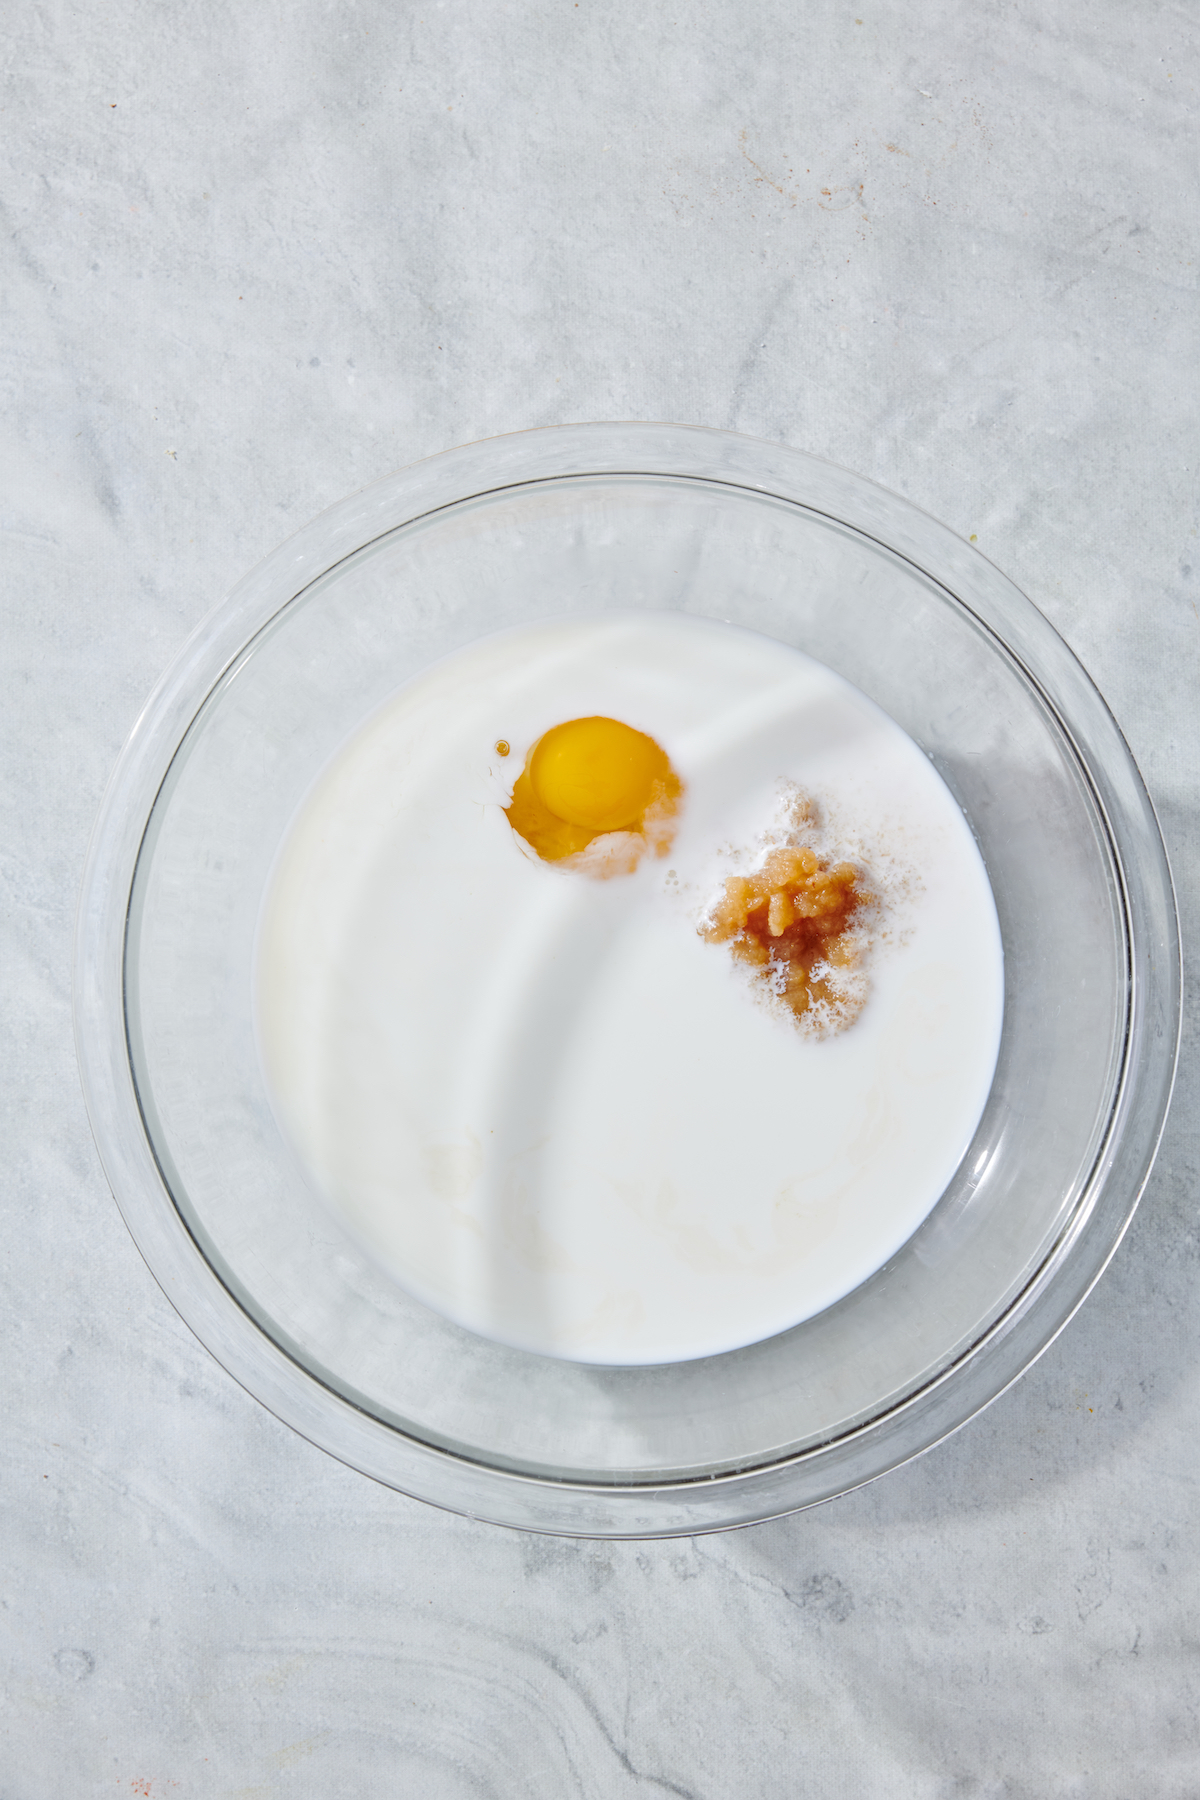
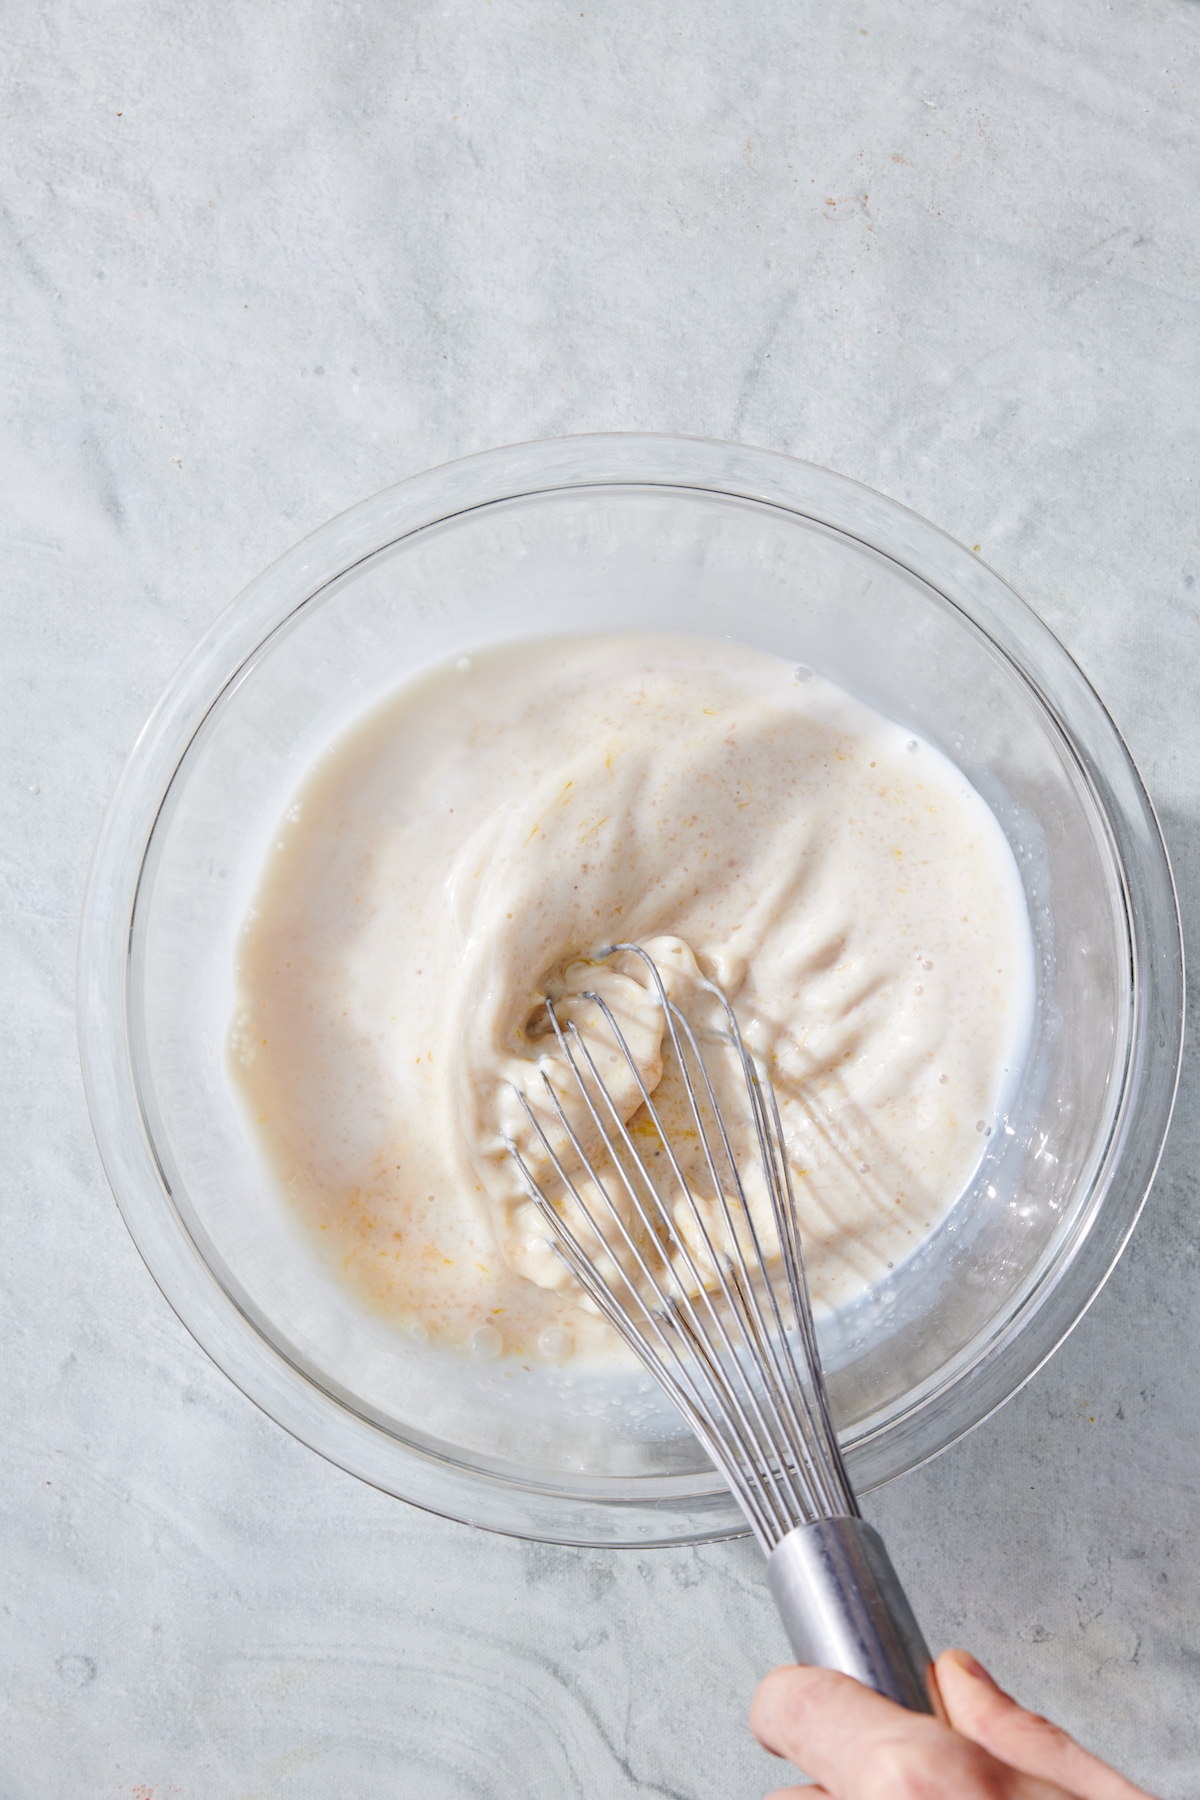
3. Mix Wet Ingredients: In a separate bowl, combine the milk, applesauce, egg, honey (agave or maple syrup), and vanilla.
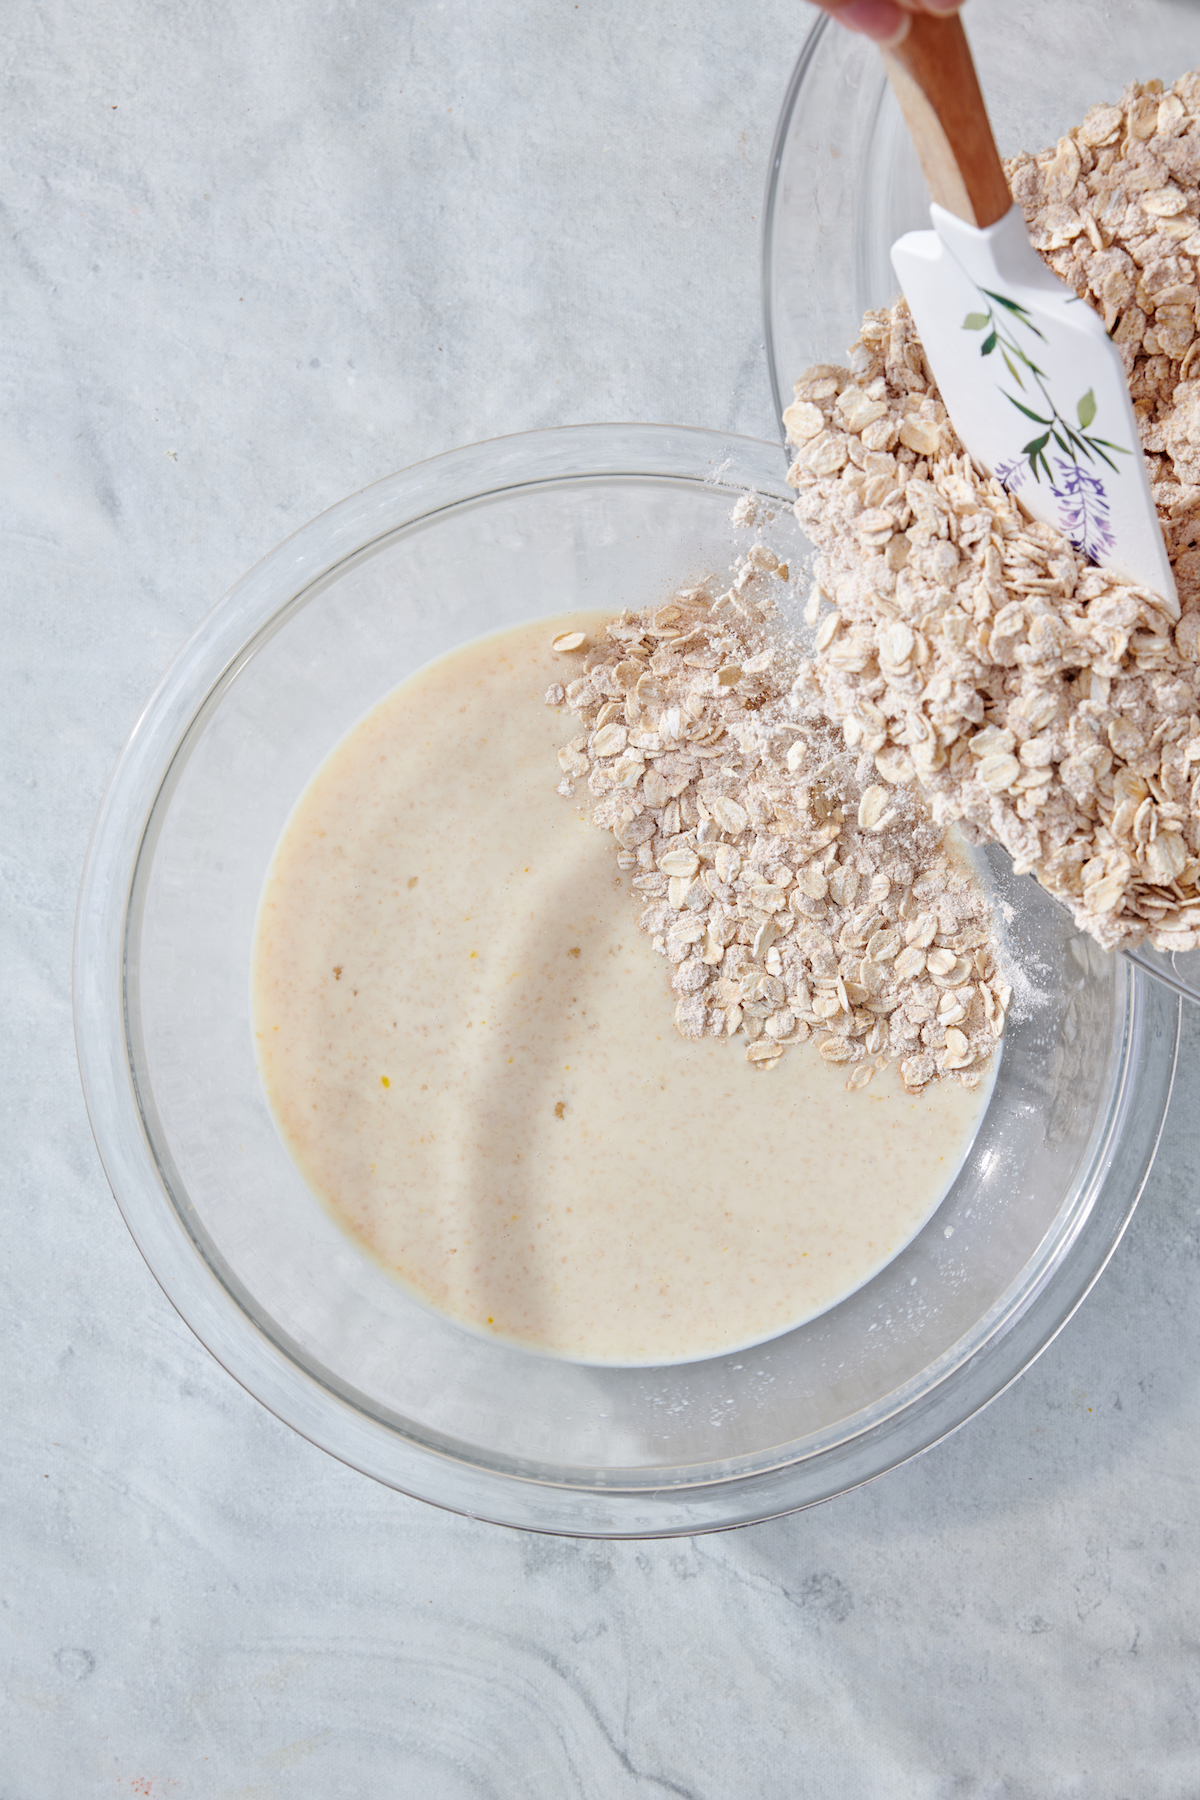
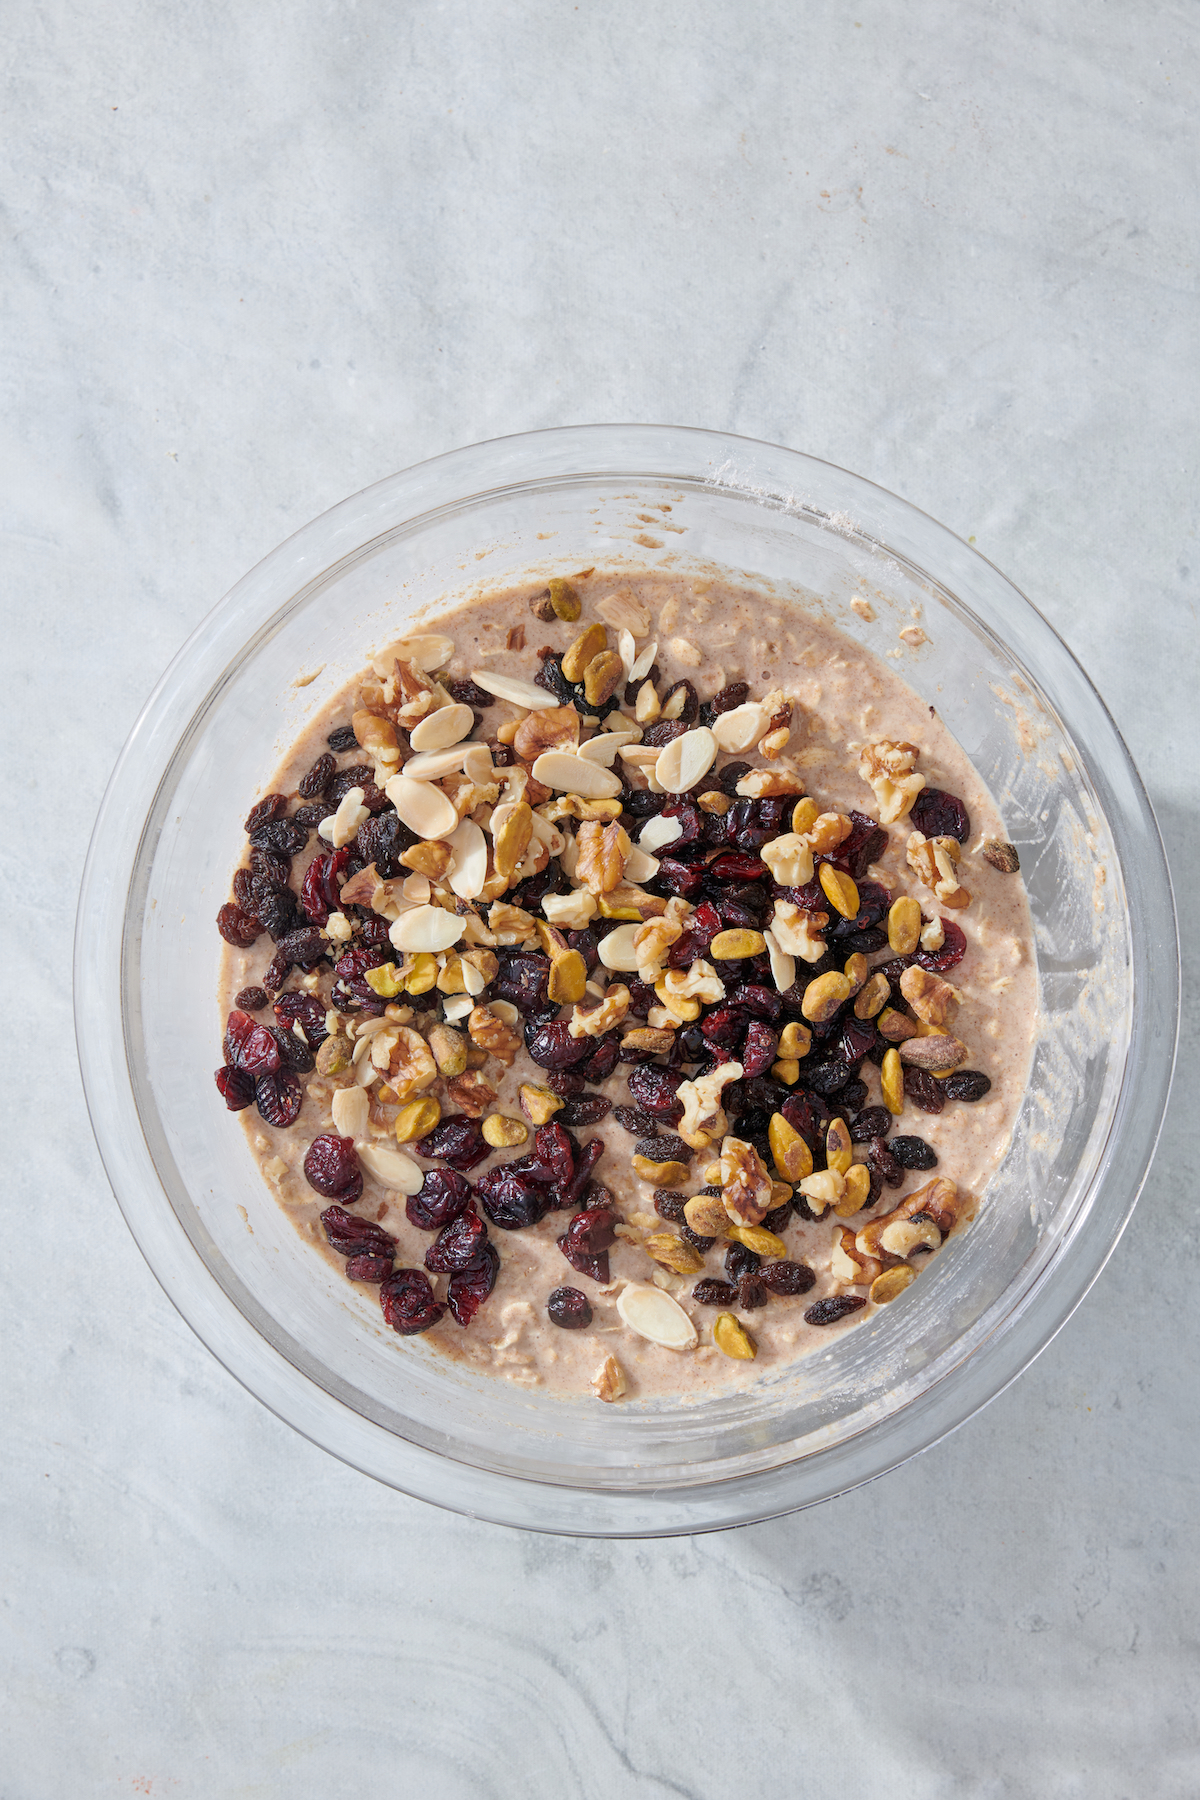
4. Blend the Mixture: Pour the dry ingredients into the wet mixture, combining them well. Add the dried fruits and nuts and mix thoroughly.
Would you like to save this?

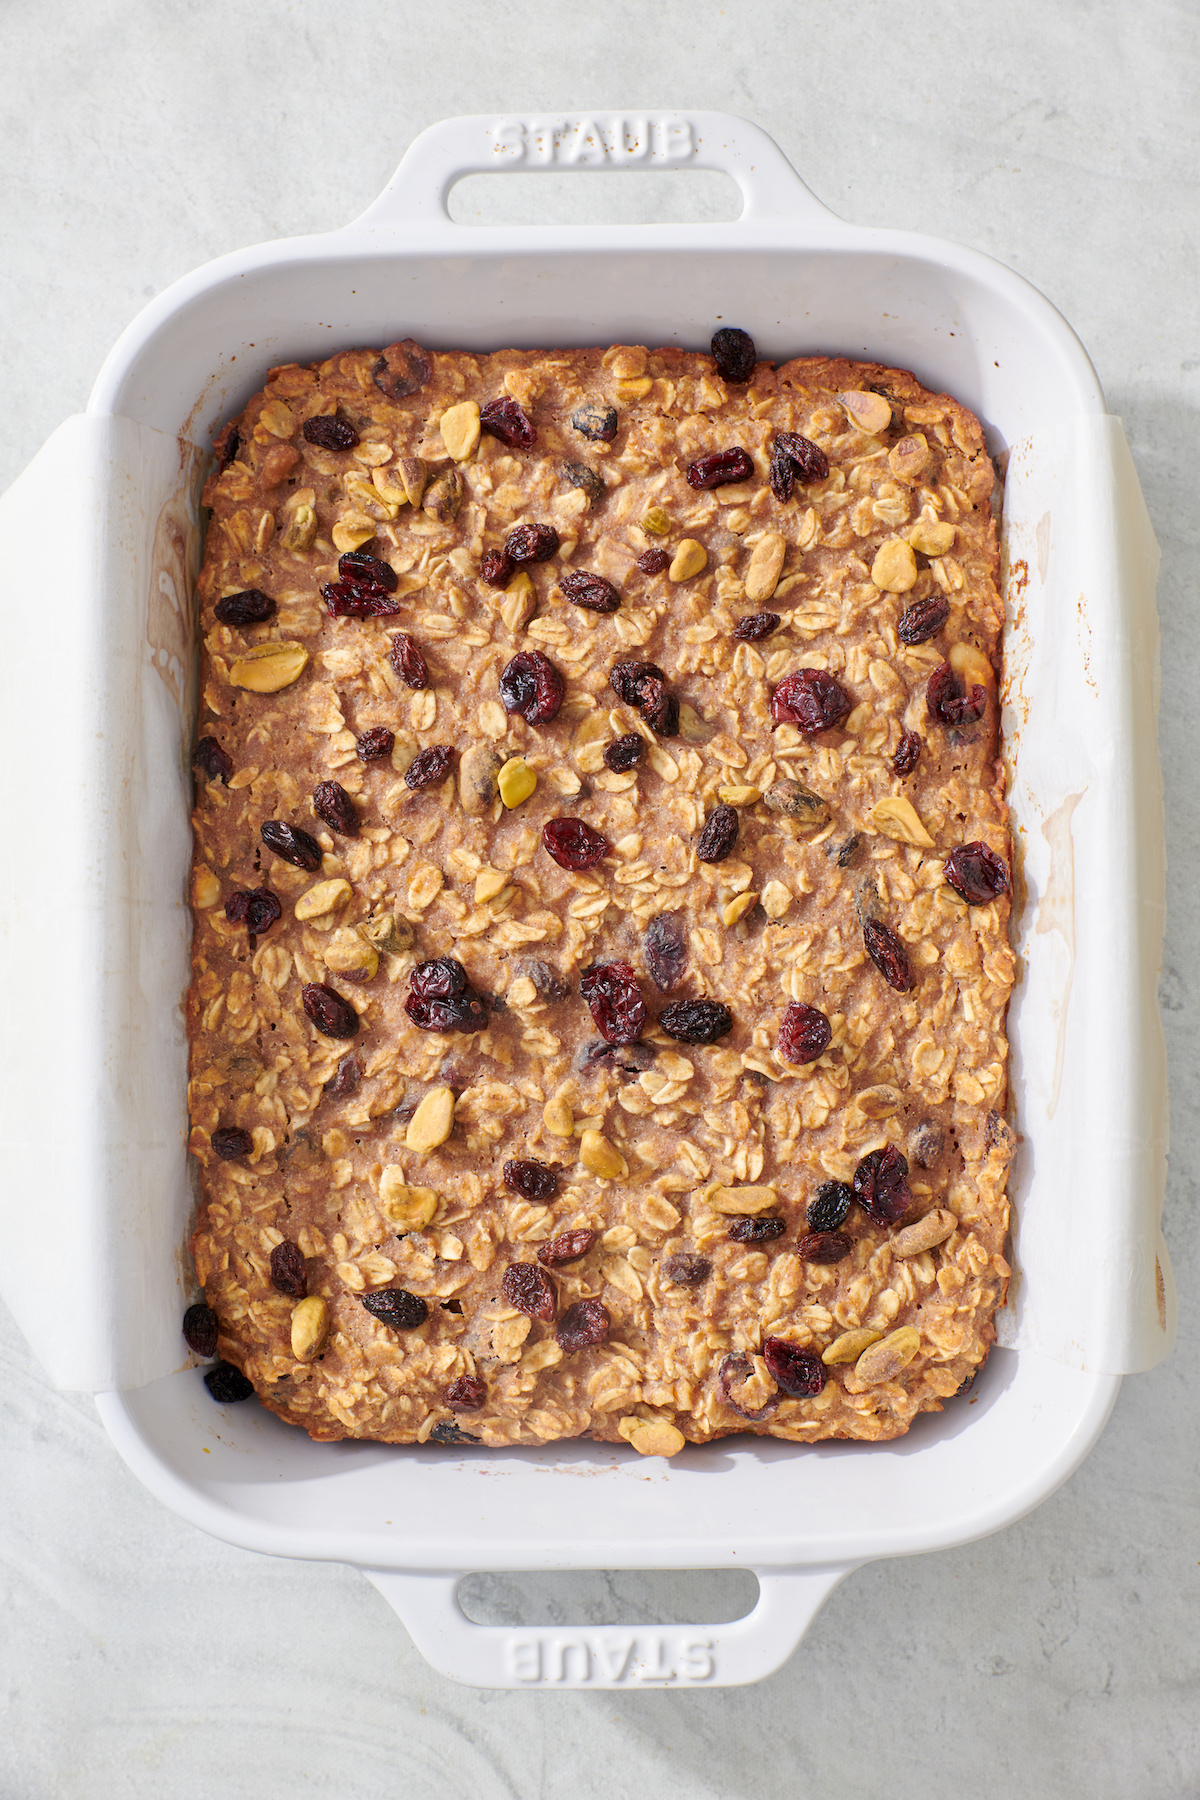
5. Transfer to Baking Dish: Pour the oatmeal mixture into a buttered, greased or parchment lined 7 x 11 inch baking dish.

6. Bake to Perfection: Bake for approximately 30 minutes or until the mixture thickens and turns a golden hue.
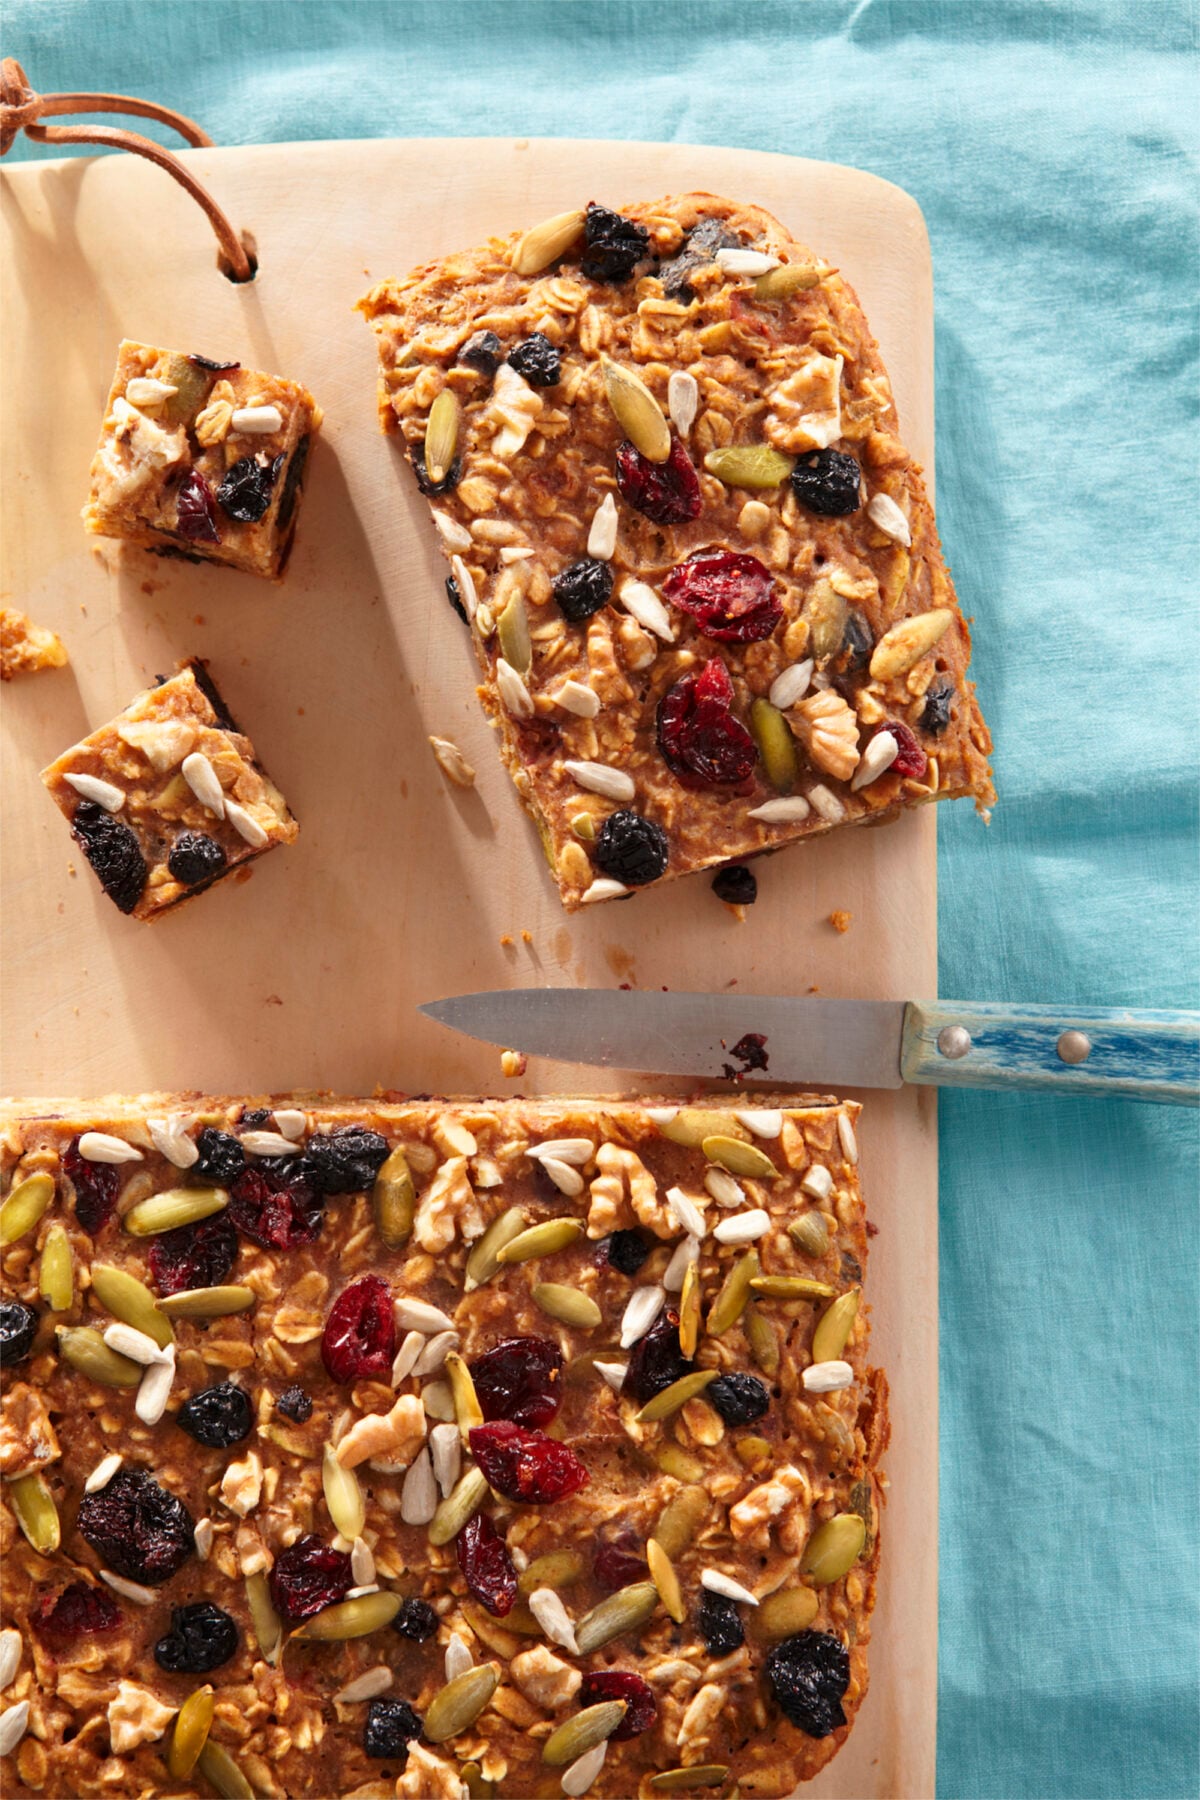
7. Cool and Serve: Let the dish cool, then cut it into squares for serving.
Are Oatmeal Bars Allergy-Friendly?
These Oatmeal-On-The-Go Bars are really easy to customize to fit any dietary preferences you or your family may have. Here are some ways you can make these bars suitable for many common allergies and sensitivities.
- Gluten-Free: Substitute your favorite 1:1 gluten-free flour for the whole wheat flour in this recipe to make these oatmeal bars gluten-free and suitable for those with gluten sensitivities.
- Dairy-Free: Use any kind of milk, such as oat, almond, or rice milk, as a suitable alternative for these oatmeal bars, making them dairy-free for individuals with lactose intolerance or dairy allergies.
- Egg-Free: Replace one egg with a small mashed banana or create a flax egg by mixing 1 tablespoon of ground flax with 3 tablespoons of water. Let the mixture sit for two minutes before using, making these oatmeal bars suitable for individuals with egg allergies or those following a vegan diet.
- Nut-Free: Leave the nuts out entirely or opt for a mixture of seeds (such as sunflower or pepitas) instead of nuts to create nut-free oatmeal bars, catering to those with nut allergies.
How to Store/Freeze Oatmeal On-The-Go Bars
- Room Temperature: You can store the oatmeal bars in an airtight container at room temperature for 1 day.
- Refrigeration: For longer storage, keep the bars in the refrigerator for up to 4 days, ensuring they are placed in an airtight container or wrapped tightly in plastic wrap.
- Freezing: To extend the shelf life even further, wrap the bars individually or place them in a single layer in an airtight container or freezer bag. They can be stored in the freezer for up to 3 months. To thaw, place in the refrigerator for 24-48 hours or defrost gently in the microwave.
More Breakfast Bar Recipes
- Chocolate Chip Granola Bars
- Protein Bars
- Protein Cereal Bars
- Fruit and Oat Crumble Bars
- 5 Ingredient Cereal Bars
- Homemade Fig Bars
For all of you “on-the-go” parents, these oatmeal bars are for you! They’re easy to make, super healthy and convenient for busy mornings! I’ve even had parents tell me that their little ones who were picky about oatmeal LOVED these bars! Give them a try and let me know what you think in the comments or tag me on social media if you make them!
Oatmeal On-The-Go Bars
Ingredients
- 2 cups old fashioned oats
- 1 cup whole wheat flour
- 1 1/2 teaspoons ground cinnamon
- pinch kosher salt
- 1 teaspoon baking powder
- 1 1/2 cups milk of choice
- 3 tablespoons honey, agave or maple syrup
- 1/2 cup applesauce
- 1 large egg
- 1 teaspoon vanilla
- 3/4 cup dried fruit (cranberries, raisins, blueberries, and/or cherries)
- 1/2 cup nuts (walnuts, sunflower seeds, and/or pepitas)
Instructions
- Preheat oven to 375°F.
- Place the first 5 dry ingredients in a bowl and stir to combine.
- Mix the milk, applesauce, egg, agave, and vanilla in a separate bowl.
- Pour the dry ingredients into the wet mixture, stir to combine and then fold in the dried fruits and nuts.
- Pour the oatmeal mixture into a buttered, greased or parchment lined 7 x 11 inch baking dish.
- Bake for 30 minutes or until thickened and golden.
- Cool completely then cut into squares or bars and serve.
Video
Notes
- Gluten-Free: Substitute your favorite 1:1 gluten-free flour for the whole wheat flour in this recipe to make these oatmeal bars gluten-free and suitable for those with gluten sensitivities.
- Dairy-Free: Use any kind of milk, such as oat, almond, or rice milk, as a suitable alternative for these oatmeal bars, making them dairy-free for individuals with lactose intolerance or dairy allergies.
- Egg-Free: Replace one egg with a small mashed banana or create a flax egg by mixing 1 tablespoon of ground flax with 3 tablespoons of water. Let the mixture sit for two minutes before using, making these oatmeal bars suitable for individuals with egg allergies or those following a vegan diet.
- Nut-Free: Leave the nuts out entirely or opt for a mixture of seeds (such as sunflower or pepitas) instead of nuts to create nut-free oatmeal bars, catering to those with nut allergies.
- Room Temperature: You can store the oatmeal bars in an airtight container at room temperature for 1 day.
- Refrigeration: For longer storage, keep the bars in the refrigerator for up to 4 days, ensuring they are placed in an airtight container or wrapped tightly in plastic wrap.
- Freezing: To extend the shelf life even further, wrap the bars individually or place them in a single layer in an airtight container or freezer bag. They can be stored in the freezer for up to 3 months. To thaw, place in the refrigerator for 24-48 hours or defrost gently in the microwave.


We made them this afternoon and they were a huge hit, even with my 7 year old picky eater.
We used honey instead of Agave and topped it (prior to cooking) with some of our homemade Peach and Nectarine Jam. The Jam wasn’t necessary but it added a nice little layer.
We will be making more to freeze and include in lunh boxes for school.
Great recipe, thank you! I love to eat oatmeal for breakfast every morning, but as you said I don’t always have time. I am keeping these refrigerated but I found that heating it for a short time (20 seconds in the microwave, I’m sure the toaster oven would work fine as well) makes them softer and a little more oatmeal-y. Next time I plan to add nutmeg and all-spice. I used honey in place of agave, plus I added a little extra brown sugar, because I like my oatmeal a little sweeter. I cut up sunflower seeds and dried cranberries so my 14 month old could eat them, and I can’t wait to let her try one this afternoon! Thanks for a great recipe.
Has anyone tried these without the baking soda or have a similar recipe without that ingredient? Just asking because I know the baking soda destroys some of the whole grain vitamins and for a breakfast bar I want all the nutrients possible….
I made these with oat flour instead of whole wheat and baked about 25 minutes, so delicious!!
OMG these are just so wonderful yumm I cooked them tonight while my baby is asleep and I’m just dying for her to try them!! I’ll give it to her tomorrow and I’m sure she’ll love them too! You make such wonderful recipes and I can’t thank you enough I’m a huge fan of them!!
Do you know how to make rainbow candy melts peanut butter cups you don’t need to die the candy melts they have all the colors candy melts
First melt all the colors candy melt red orange yellow green blue and purple then put 1 drop just a drop of the red candy melts then 1 drop of the orange candy melt. Then a drop of the yellow candy melt then a drop of the green candy melt then a drop of blue candy melt then a drop of purple candy melts then frees then make the peanut butter filling the take the the candy melts out put the filling in then put More of the candy melt don’t layer the candy melt put next to each candy melt like the orange candy melt will go next to the red candy melt then frees it done!
Can you make it at August 19
Don’t mix the candy melts just add a drop of candy melt
Oh interesting! Unfortunately I do not use products that contain food coloring, but you should be able to recreate this recipe http://b12.ba4.myftpupload.com/2012/02/07/chocolate-peanut-butter-cups-with-sea-salt-the-perfect-homemade-gift-for-your-loved-ones/ using any type of chocolate or candy melts you prefer. 🙂
Freezer tip I learned from the Meal Makeover Moms… if you have time to put things in the freezer for an hour not touching, you can then let them bunch up in the bag in the freezer without them getting stuck together. I use this tip with muffins, pancakes, waffles and granola bars all the time. So much more eco-friendly than individually wrapping them for the freezer. I’ll make these instead of the “Mom’s” recipe next time. With their bars, I pull them out of the freezer and they are ready for me to eat immediately, and softened up for my kids within about 10. They don’t have flour though, so that may make a difference. Thank you Catherine for ANOTHER great recipe!
Yes! Honey and agave are fully interchangeable! Use the same amount of honey as the agave called for in the recipe (this applies to any recipe using honey or agave)! 🙂
Can you sub honey for the agave? I’d like to try these and have everything but agave.
I would check them after 15 minutes!
any idea if the cooking time would diffrent if I made it in a muffin pan?
I used almond milk for the milk plus I was out of eggs so I used 1/2 ripe mashed banana. My girls couldn’t get enough!
I used a 9×13 pan and cooked for exactly 20 min. They came out perfect!