
This post may contain affiliate links. Please read our disclosure policy.
Homemade Fig Bars are easy, healthy and better than anything you can buy in the store. They’re going to blow your mind.
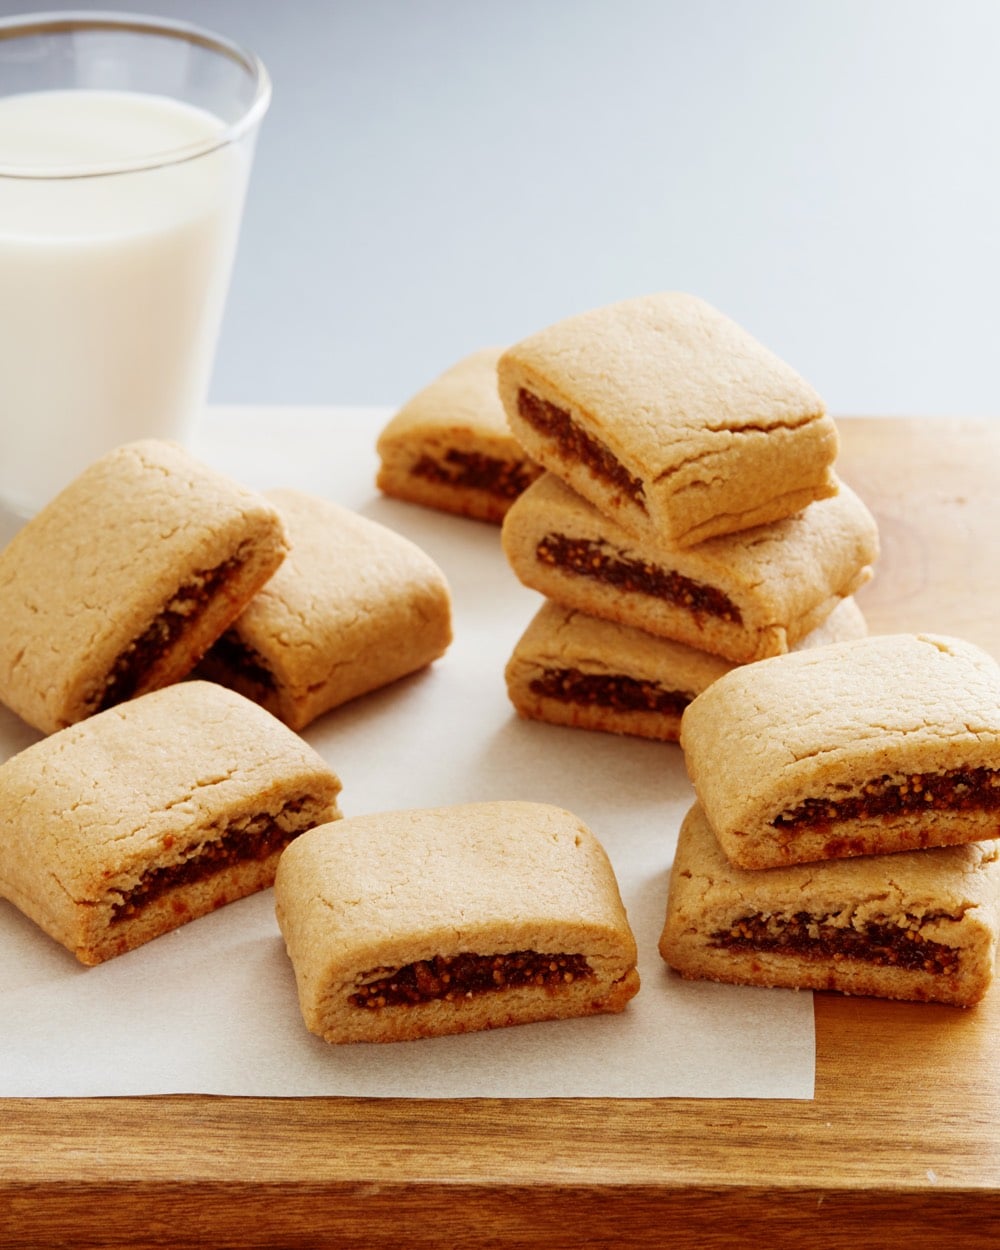
Table of Contents
Why I Love This Recipe
Did you grow up with Fig Newtons, graham crackers, or Oreos in the pantry? My mom leaned into Fig Newtons, probably thinking the fig filling made them the “healthier” choice, even though she usually baked from scratch. These days, I’ve created homemade versions of all my childhood favorites, including homemade graham crackers, chocolate chip cookies, and homemade Oreos.
Still, I assumed homemade fig newtons would be tricky. I was wrong. They’re easy to make, just like a batch of cookies, with a sweet, jammy fig filling and soft whole wheat crust. My kids actually prefer them to the store-bought kind!
Even better? They stay moist and delicious for days. Once you try these, you won’t miss the packaged version one bit.
The Ingredients
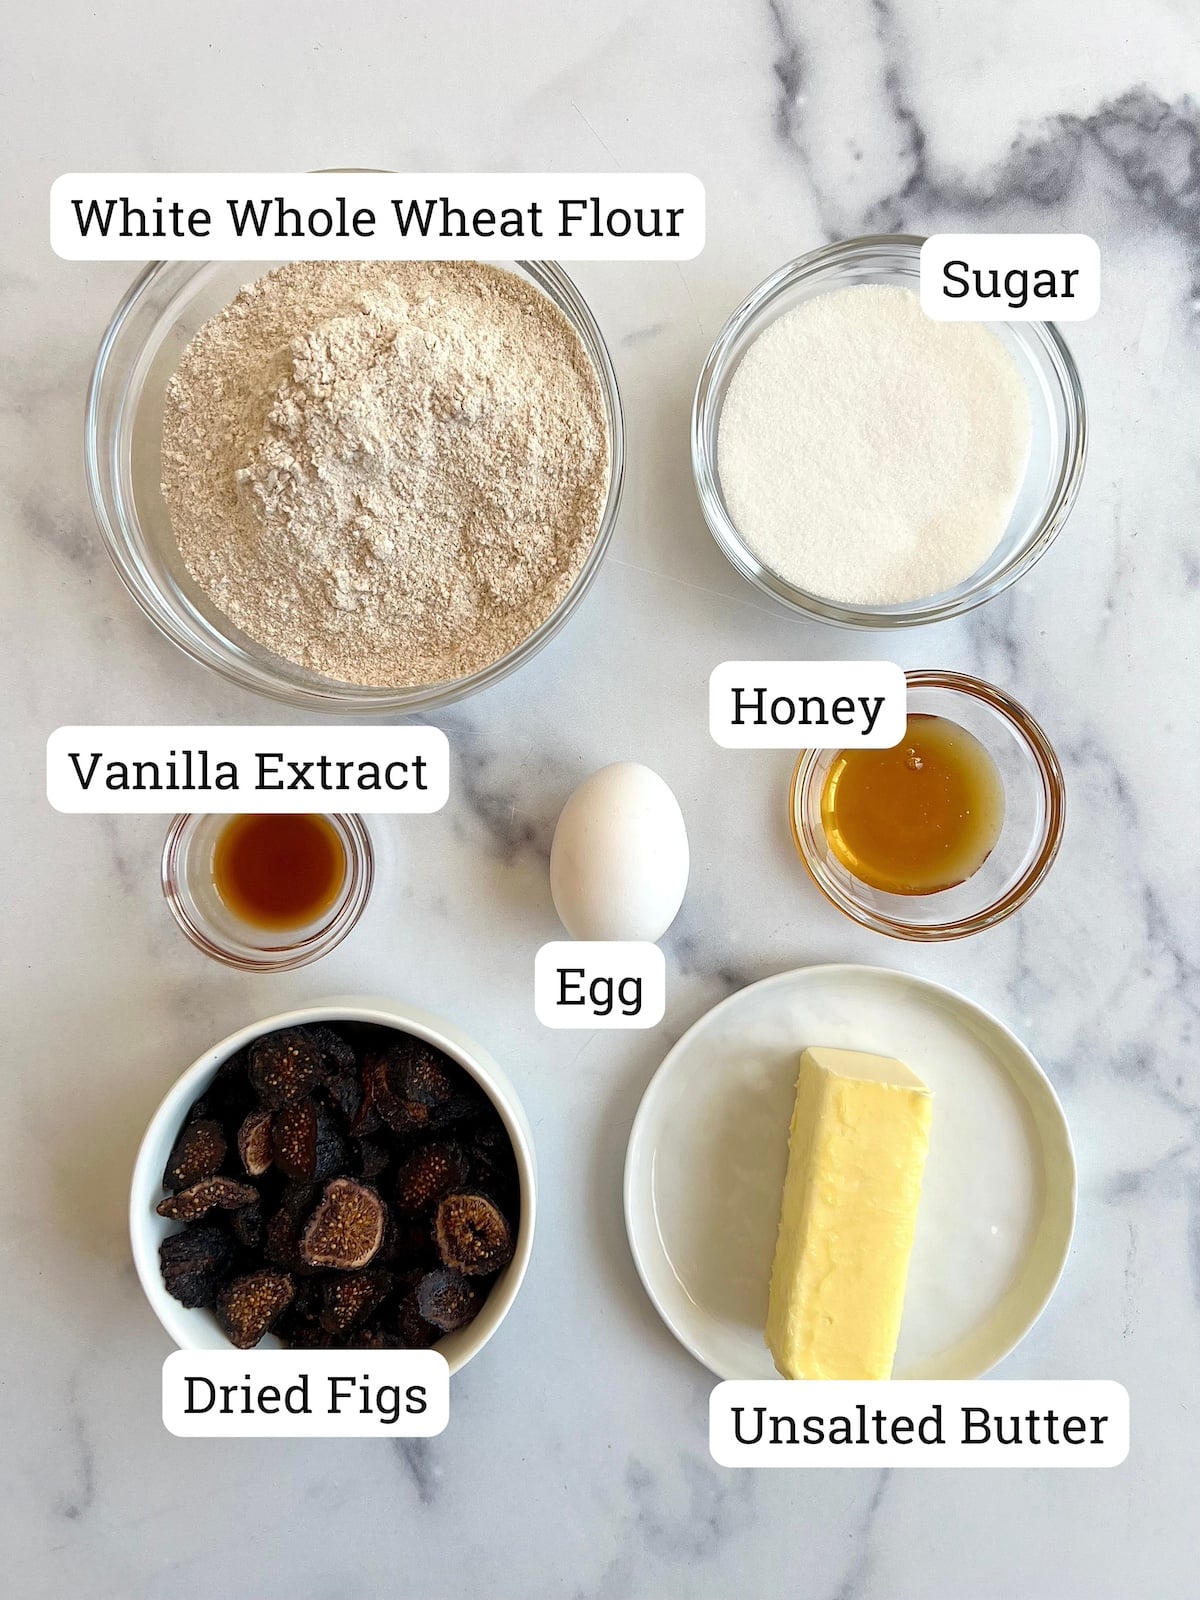
- Dried figs, stems removed: Figs provide natural sweetness and a chewy texture that makes these bars irresistible.
- Honey: Adds a touch of extra sweetness to the fig filling.
- Unsalted butter: Helps create that tender, flaky texture in the cookiedough. Use softened butter for the best results.
- Sugar: Just enough to sweeten the dough without overpowering the natural fig flavor.
- Large egg: Adds richness and helps bind the dough together.
- Vanilla extract: Infuses the dough with a warm, aromatic flavor.
- White whole wheat flour – A healthier alternative to regular flour, offering a boost of fiber and nutrients.
Substitutions and Variations
- Figs: If you’re not a fan of figs, try using dried dates, apricots, or prunes for a different flavor.
- Honey: Maple syrup or agave nectar can be used in place of honey.
- Sugar: Swap out the sugar for coconut sugar or a sugar substitute like monk fruit sweetener for a lower-glycemic version.
- Flour: If you prefer, you can use all-purpose flour or a gluten-free flour blend instead of white whole wheat flour.
How to Make Homemade Fig Bars

Step 1: Preheat your oven to 350°F. Place the dried figs in a small bowl, cover with hot water, and soak for 10 minutes.
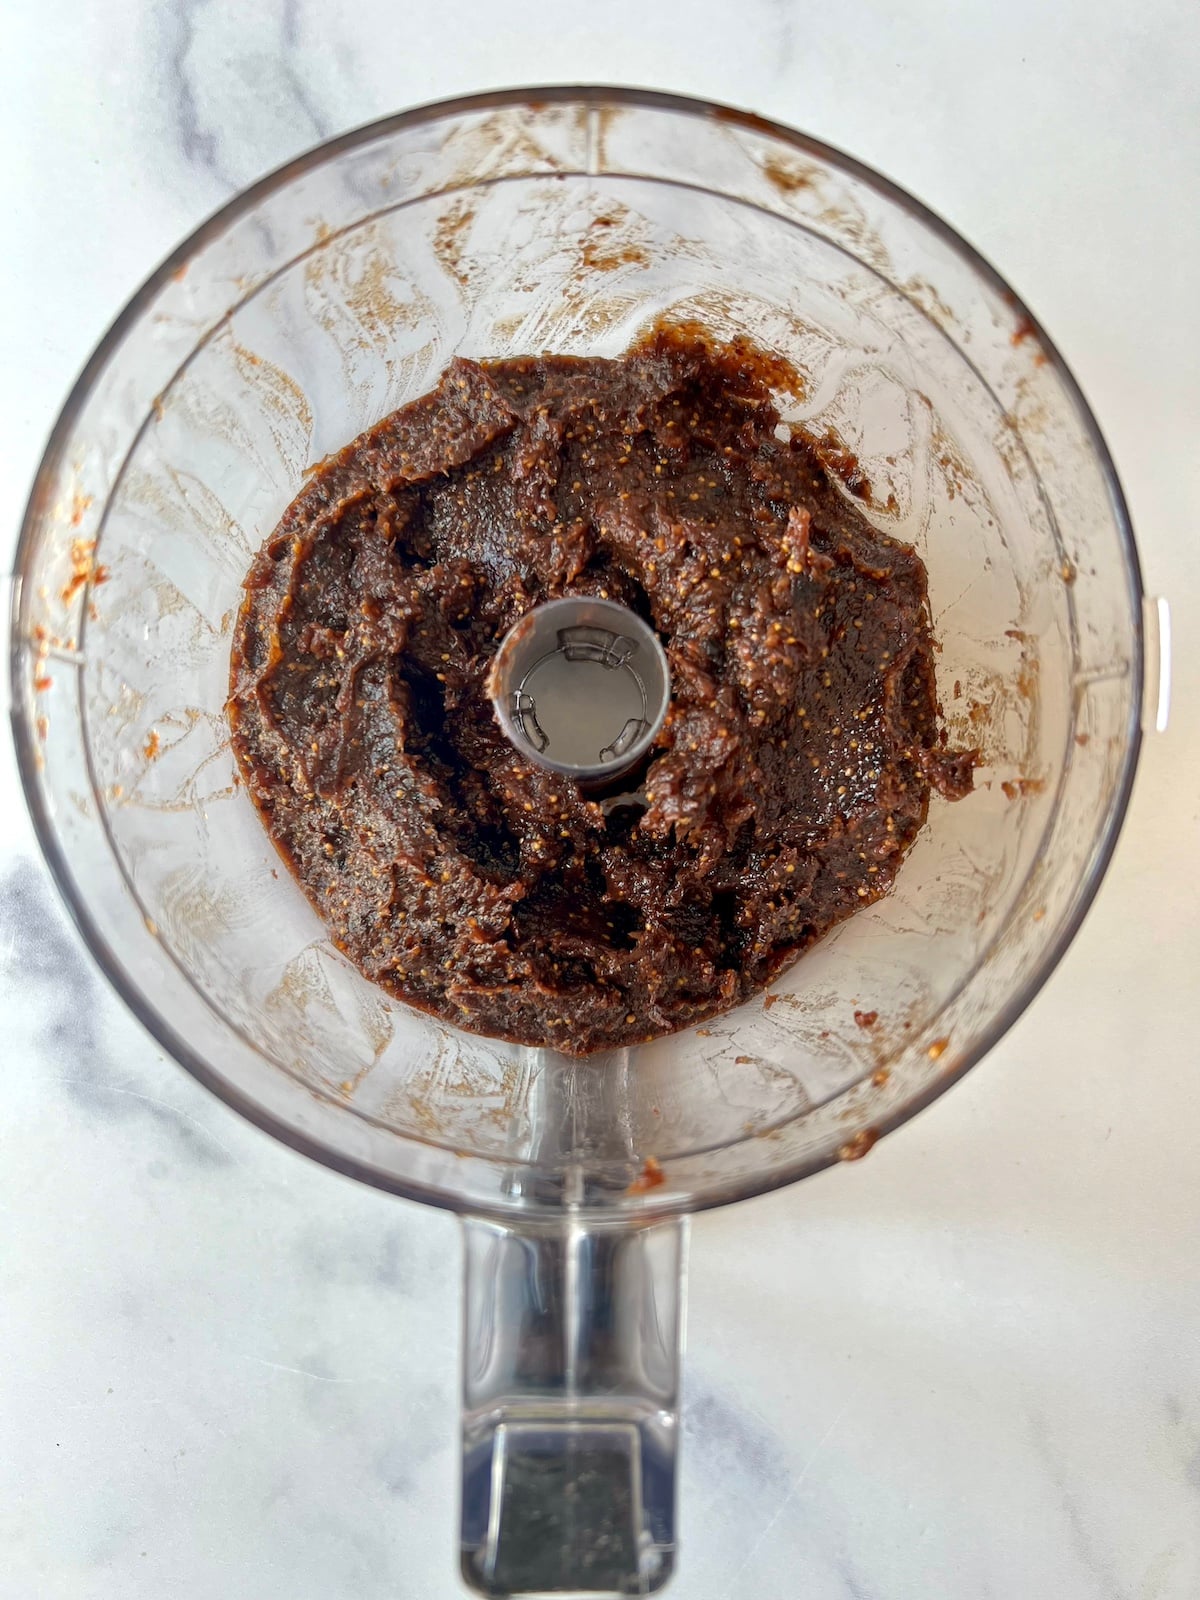
Step 2: Remove the figs from the water with a slotted spoon and place in the bowl of a food processor. Add the honey and 1 tablespoon of the soaking liquid. Puree until smooth and spreadable.
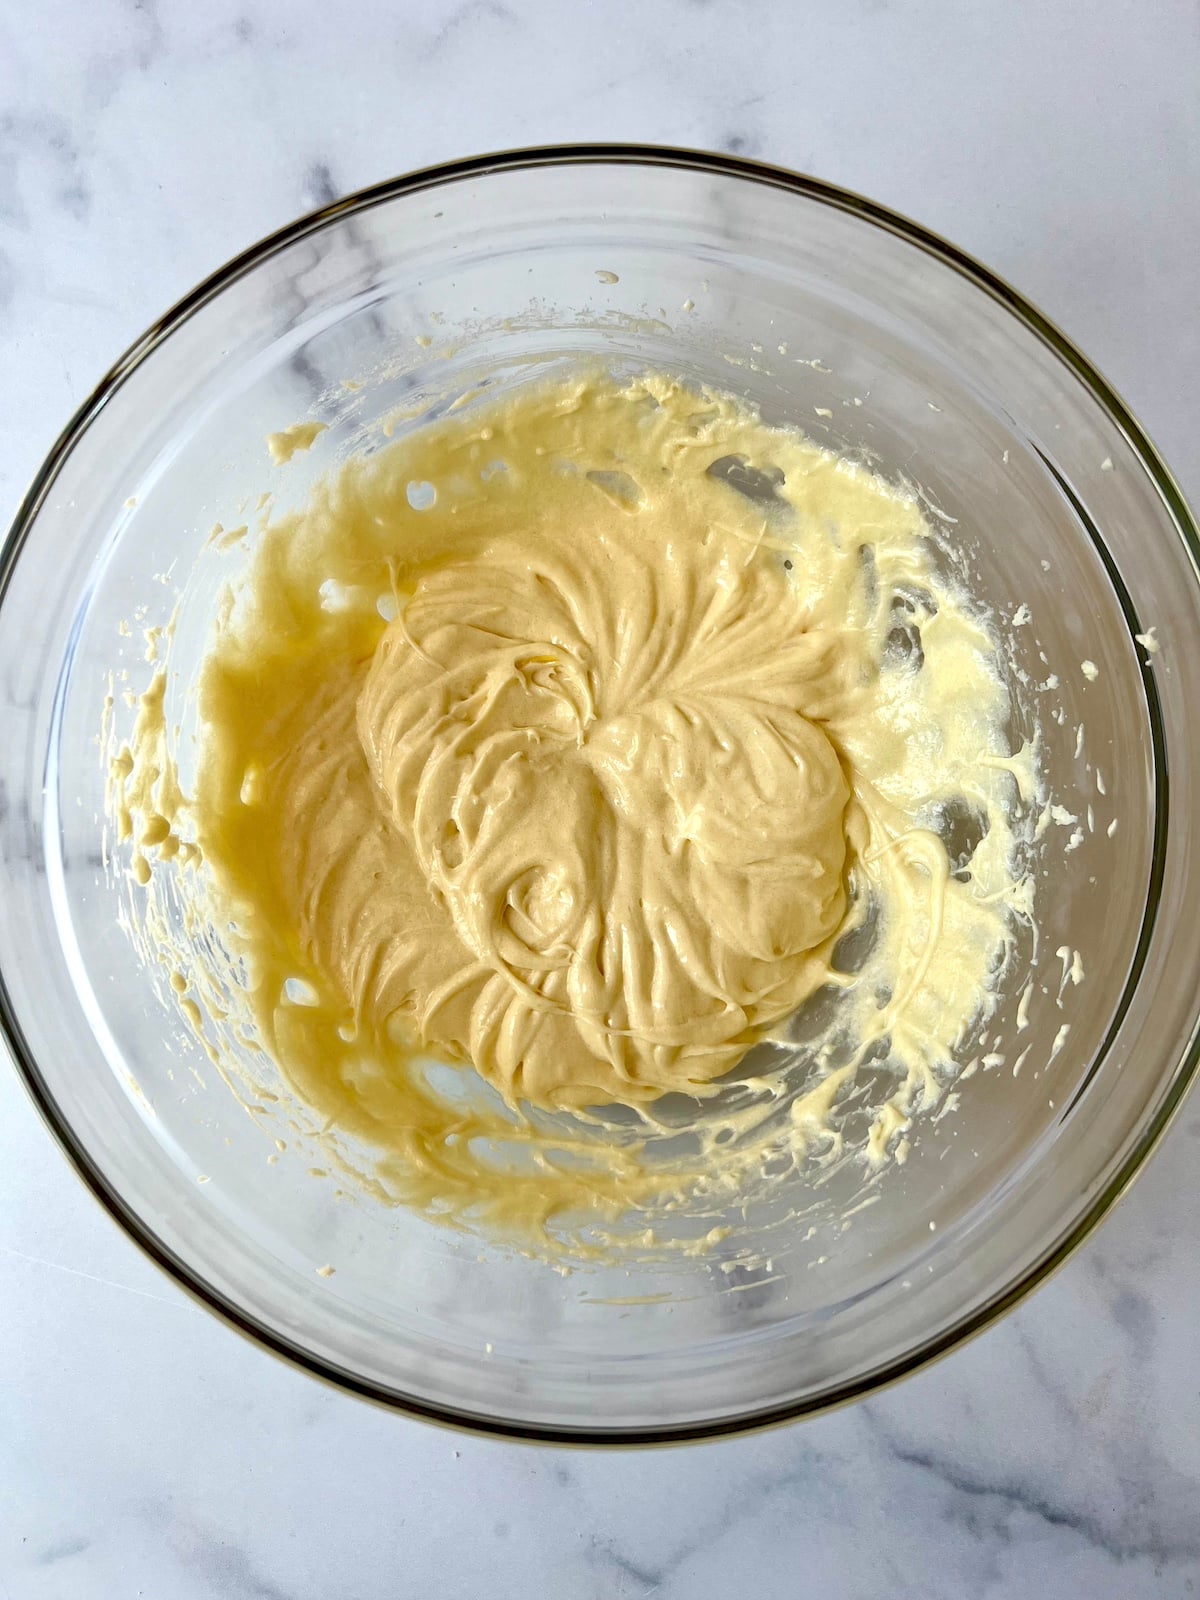
Step 3: In the bowl of a standing mixer, or with a hand mixer, cream together the butter and sugar for 2 minutes, or until smooth. Add the egg and vanilla and mix until incorporated.
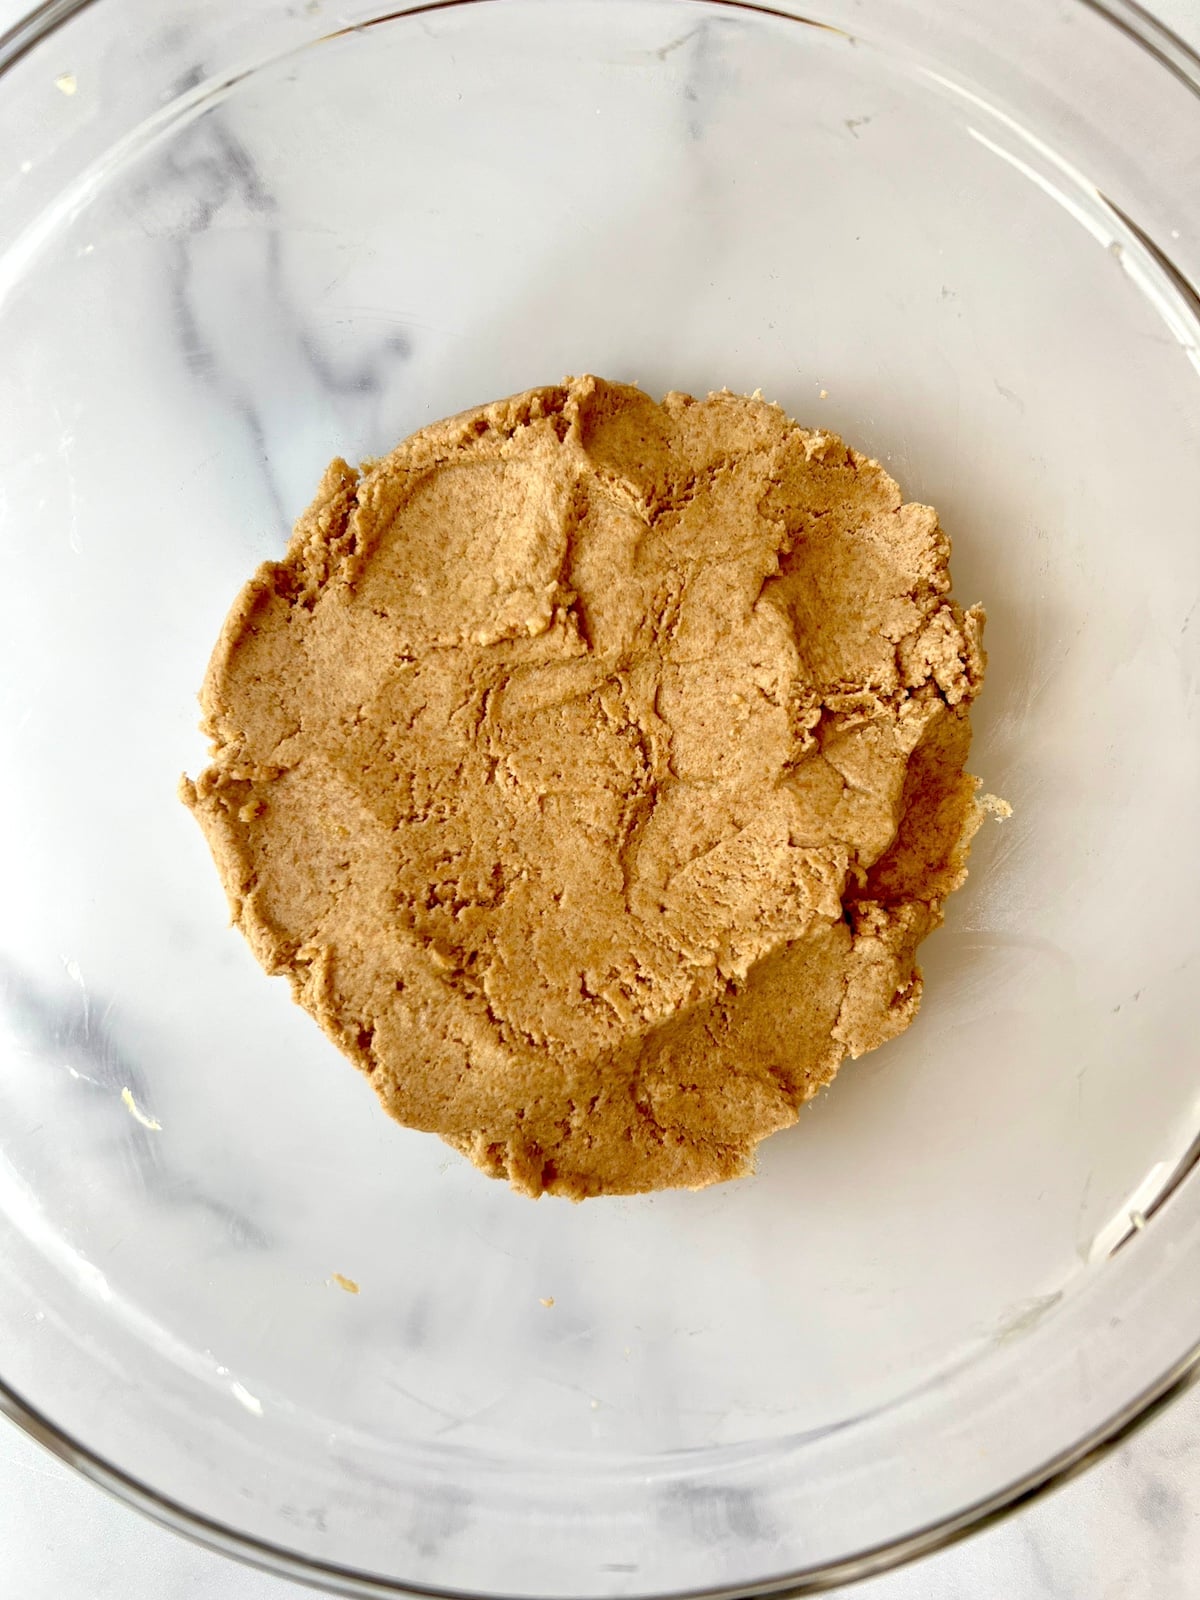
Step 4: Add the flour and mix until a dough forms.
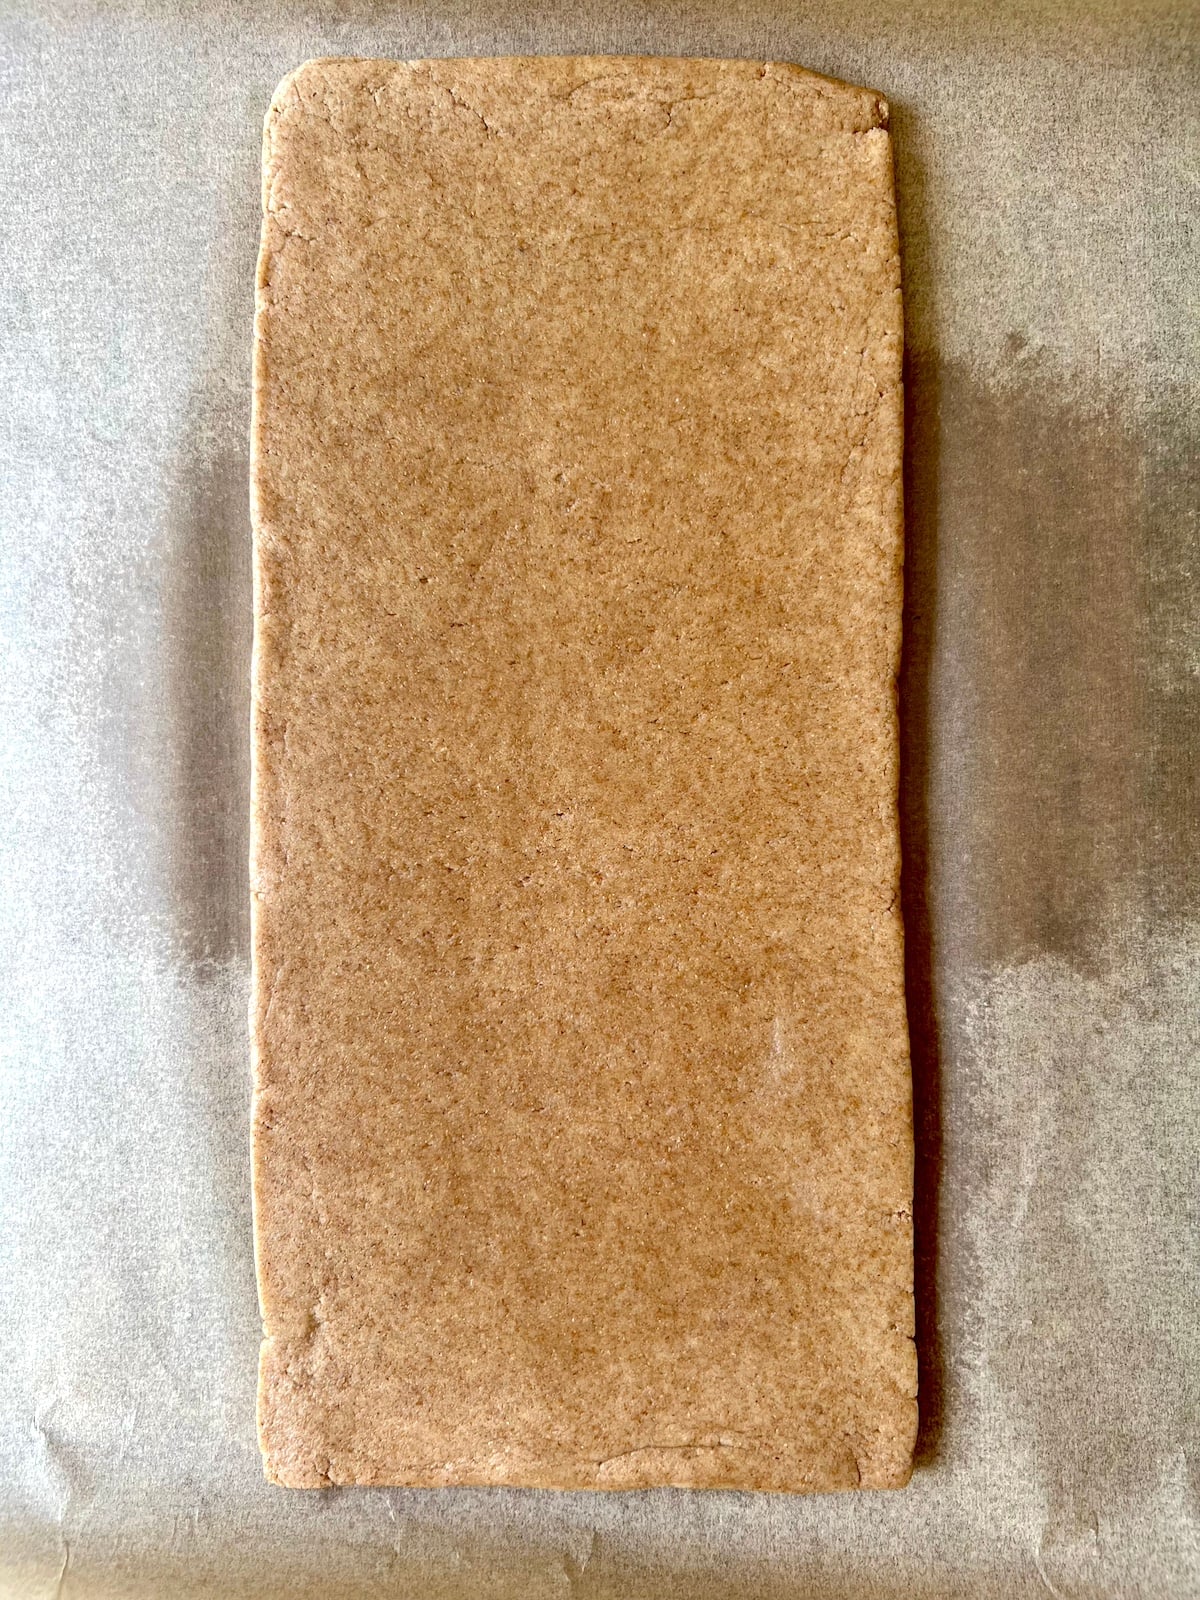
Step 5: Roll dough between two pieces of parchment paper and shape into a 12 x 5 inch rectangle.
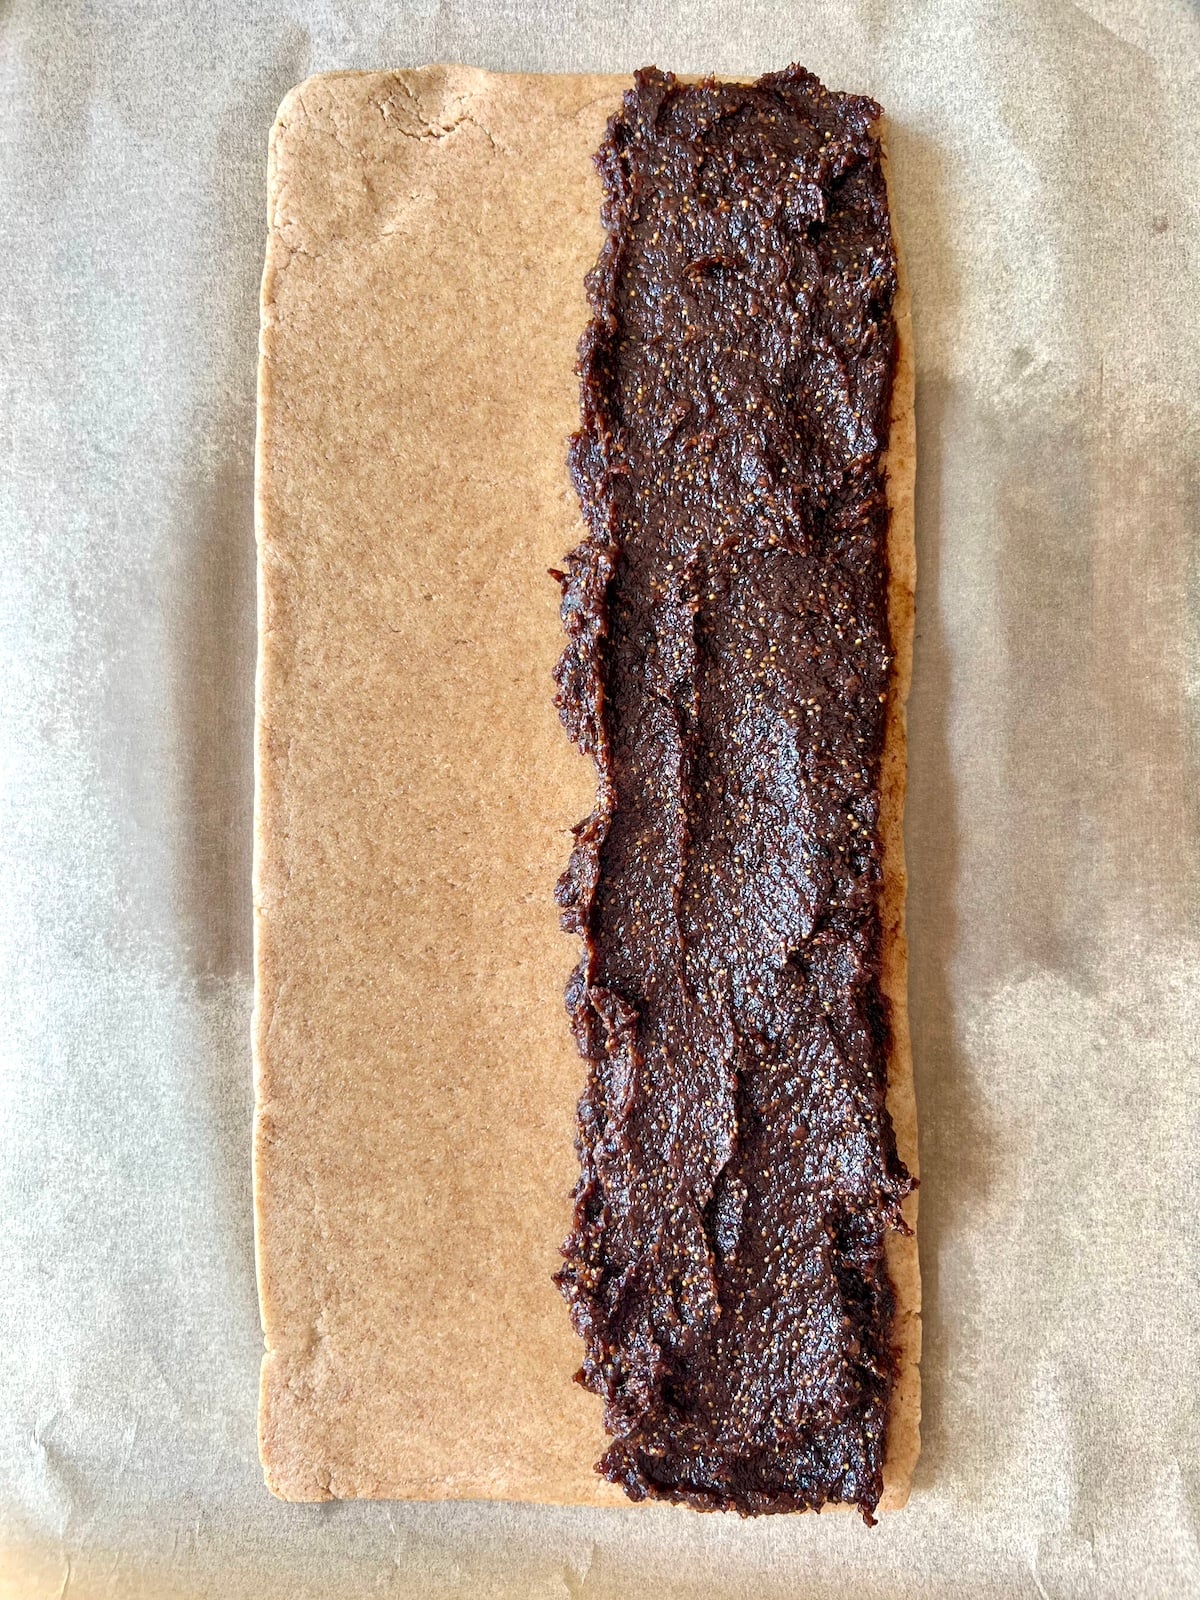
Step 6: Spread the fig mixture on one side of the rectangle, spreading it evenly along the 12-inch side leaving a 1/4-1/2 inch border along the edges.
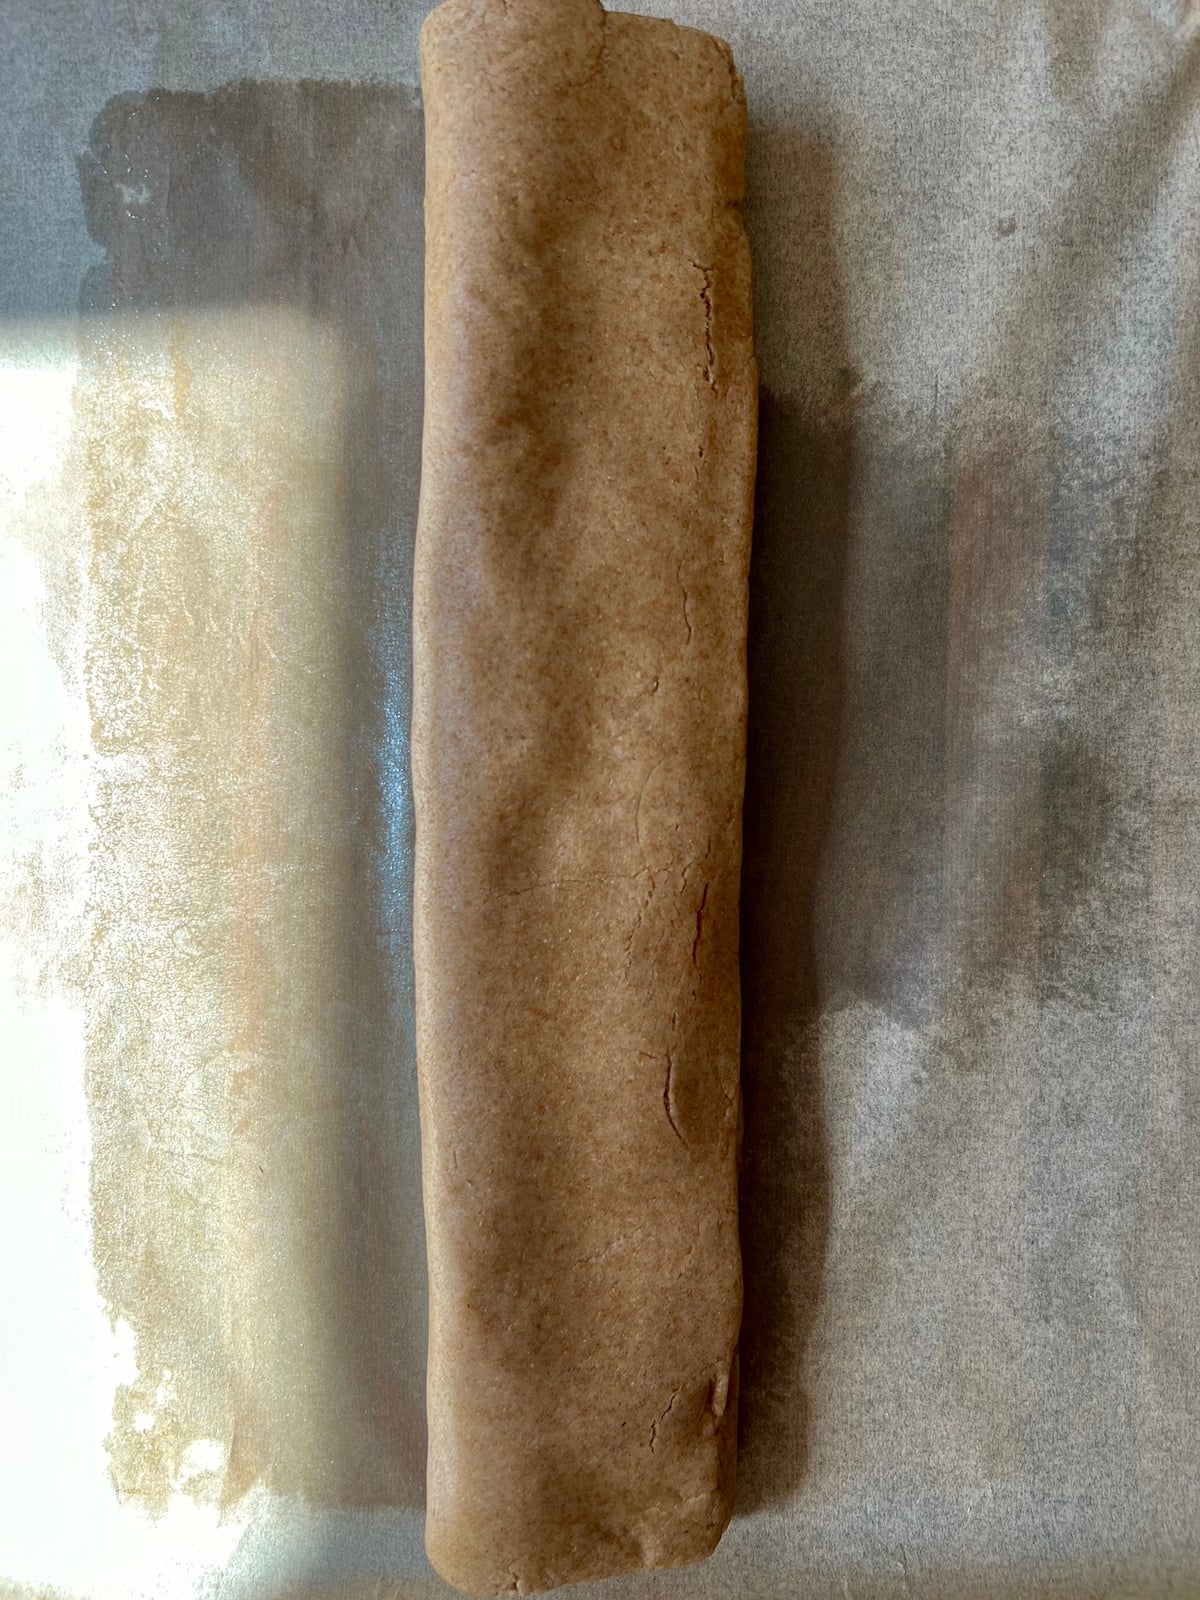
Step 5: Fold the dough over on top of itself and gently press the dough together at the edges.
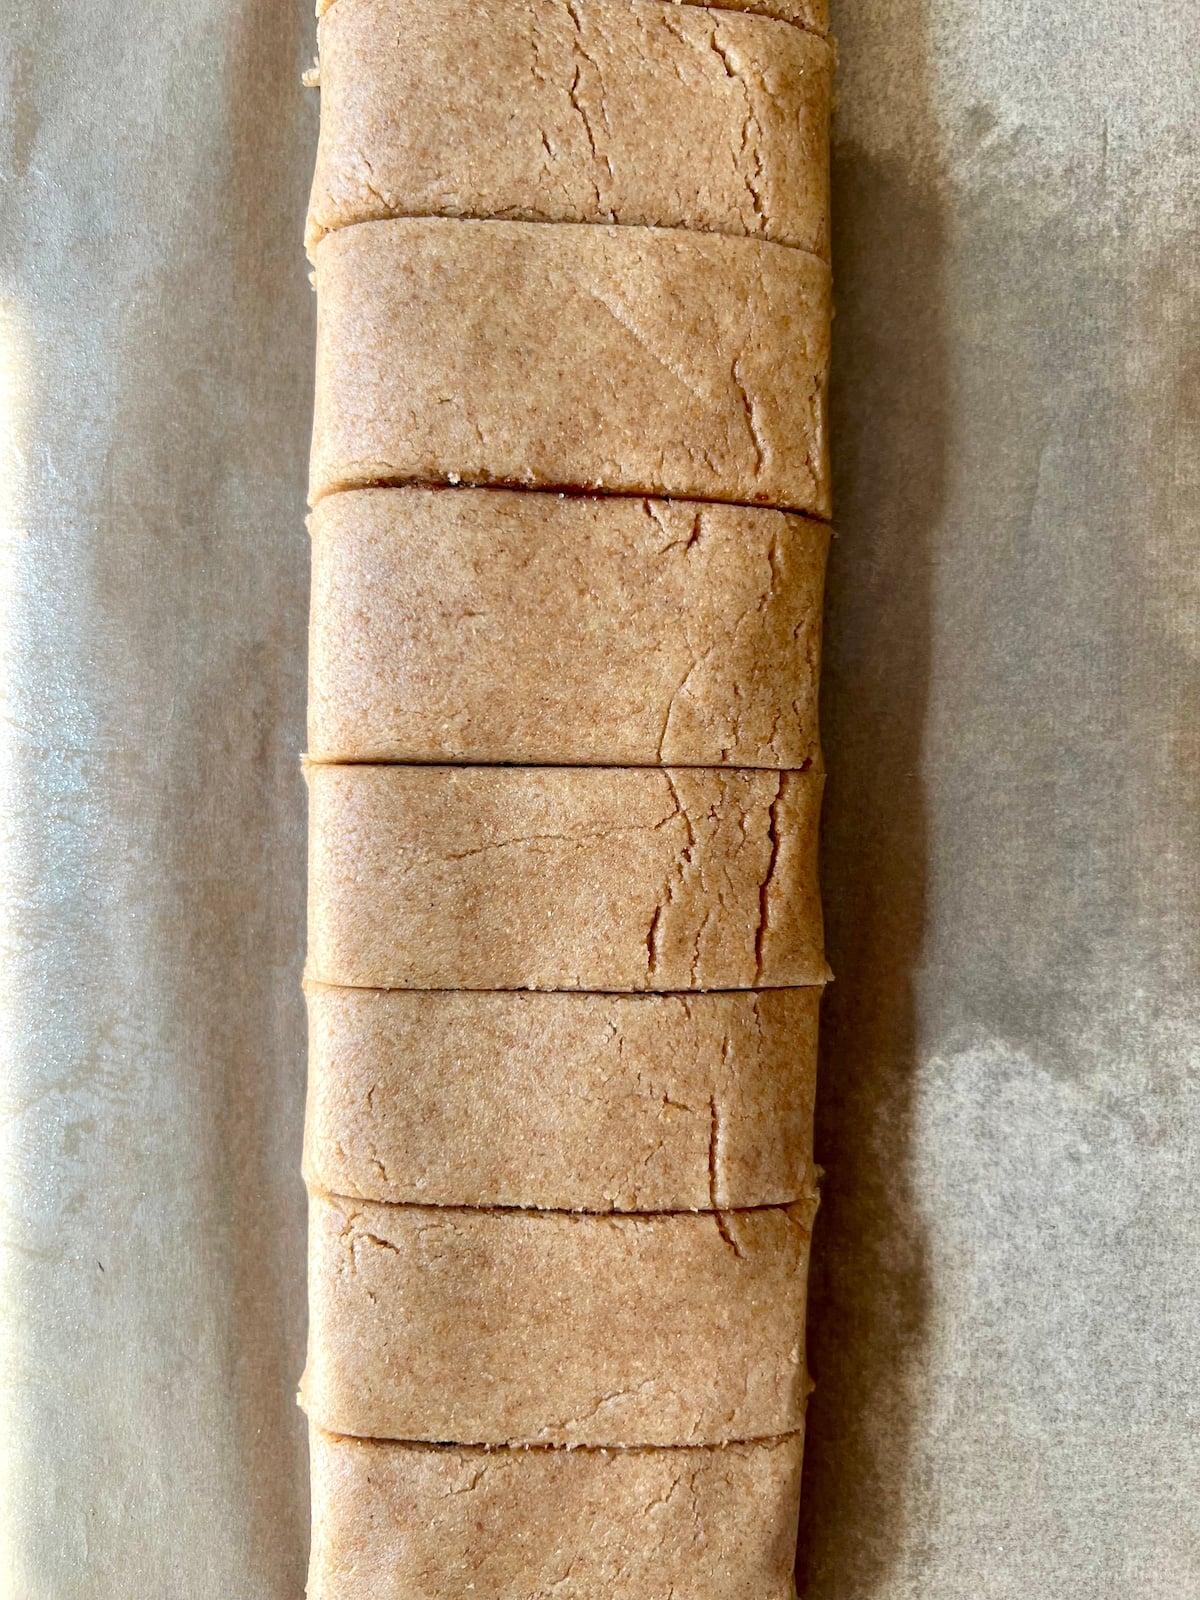
Step 6: Cut each log into 10 cookies and transfer to a silpat or parchment-lined baking sheet. Bake 15-20 minutes, or until golden.
Recipe Video
Tips for Perfect Homemade Fig Bars
- Use quality dried figs: The flavor of your bars will depend largely on the quality of your figs, so choose ones that are plump and moist.
- Don’t skip the soaking step: Soaking the figs ensures they’re soft enough to blend into a smooth filling.
- Seal the edges well: To prevent the filling from leaking out during baking, make sure to press the edges of the dough together firmly.
FAQs
Yes, you can use fresh figs, but you may need to cook them down to reduce the moisture before blending into a smooth filling. Dried figs are recommended as they provide a thicker, more concentrated flavor.
Store your fig bars in an airtight container at room temperature for up to a week. For longer storage, you can refrigerate them for up to two weeks or freeze them for up to three months.
You can get creative with fillings! Try using a mix of dried fruits like apricots, dates, or raisins. You can also add a touch of orange zest, lemon zest or a splash of lemon juice to the fig filling for a citrusy twist.
Absolutely! Just substitute the white whole wheat flour with a gluten-free flour blend that you trust works well for baking.
More Homemade Snacks


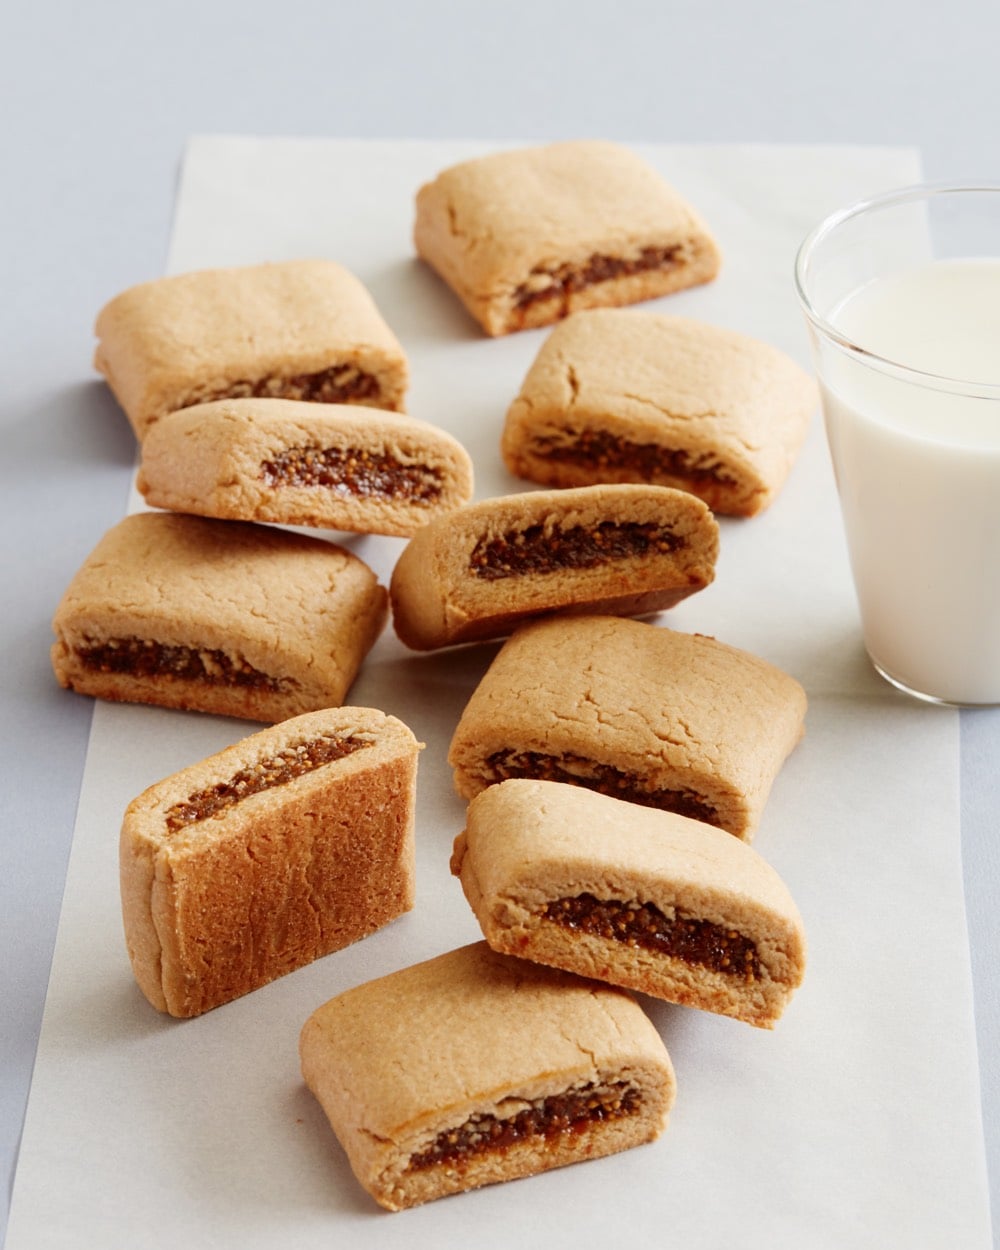
If you’ve ever loved the nostalgic taste of Fig Newtons, this homemade fig bar recipe is a must-try. They’re easy, made with wholesome ingredients, and way more delicious than the store-bought kind. Whether you’re packing them in lunchboxes, serving them as an after-school snack, or enjoying one with your afternoon coffee, these homemade fig newtons are a treat everyone will love.
If you make this recipe, I’d love to hear how it goes! Leave a comment and rating below or tag me on social so I can see your beautiful bakes.
Want more Weelicious? Subscribe to my newsletter and follow me on Instagram, Facebook, and TikTok for all the newest recipes!
Would you like to save this?

Homemade Fig Bars
Equipment
- Food Processor
Ingredients
- 1 cup roughly chopped dried figs, stems removed
- 1 tablespoon honey
- 6 tablespoons unsalted butter, softened
- 1/2 cup sugar
- 1 large egg
- 1 teaspoon vanilla extract
- 1 1/2 cups white whole wheat flour
Instructions
- Preheat your oven to 350°F.
- Place the dried figs in a small bowl, cover with hot water, and soak for 10 minutes.
- Remove the figs from the water with a slotted spoon and place in the bowl of a food processor. Add the honey and 1 tablespoon of the soaking liquid. Puree until smooth and spreadable.
- In the bowl of a standing mixer, or with a hand mixer, cream together the butter and sugar for 2 minutes, or until smooth. Add the egg and vanilla and mix until incorporated.
- Add the flour and mix until a dough forms.
- Roll dough between two pieces of parchment paper and shape into a 12 x 5 inch rectangle.
- Spread the fig mixture on one side of the rectangle, spreading it evenly along the 12-inch side leaving a 1/4-1/2 inch border along the edges.
- Fold the dough over on top of itself and gently press the dough together at the edges.
- Cut each log into 10 cookies and transfer to a silpat or parchment-lined baking sheet.
- Bake 15-20 minutes, or until golden.


Just roughly chop and puree the figs! They should come out to the correct consistency. Let me know how they turn out!
oh yes, any ideas how to make adjustments for fresh figs? I just moved into a new house that has a fig tree out back, and I have no idea how to use them all!
I’m going to attempt these gluten free with coconut flour. If anyone has tips feel free to post.
Those are the best but SO pricey! I’ll make my own from now on 🙂
have you tried the Fig Newmans by Paul Newman? They are very good and healthier then the normal store bought ones.
Yes 350! Thanks. 🙂
Is thethe baking temperature 350 degrees?
The filling does not ooze out. Yes, the half-inch border is just for the long side so you have a place to pinch the dough together!
Questions about the recipe – it says to cut into bars before baking. Will this filling ooze out of the cookie during the baking process? Also, do you only leave the 1/2-in border on the long (12″) side of the dough (so that the first and last cookie in the log have figgy goodness throughout and don’t get shortchanged)? Thank you!
I think you could do this with just about any dried fruit using the same method!
I have been waiting for this type of recipe from you forever!! 🙂 But…….if figs are not commonly available where you live, could you substitute another fruit filling, thereby making them a healthier version of cereal bars (a la nutrigrain types)? Could you suggest how to cook the filling so it is thick enough?
Thank yo so much! I am so excited to try these out before school starts!
You could use preserves if they are more like a thick paste and not very watery!
Do you think you could use jam in these like the raspberry or strawberry kind? I don’t have figs, but have all the rest of the ingredients on hand 🙂
Just puree the figs in the food processor! No need to soak or anything.
Could you use fresh figs? How would do it with fresh figs? I have a fig tree ready to burst! Thanks!!
Oh yummy! I can’t wait to try these!